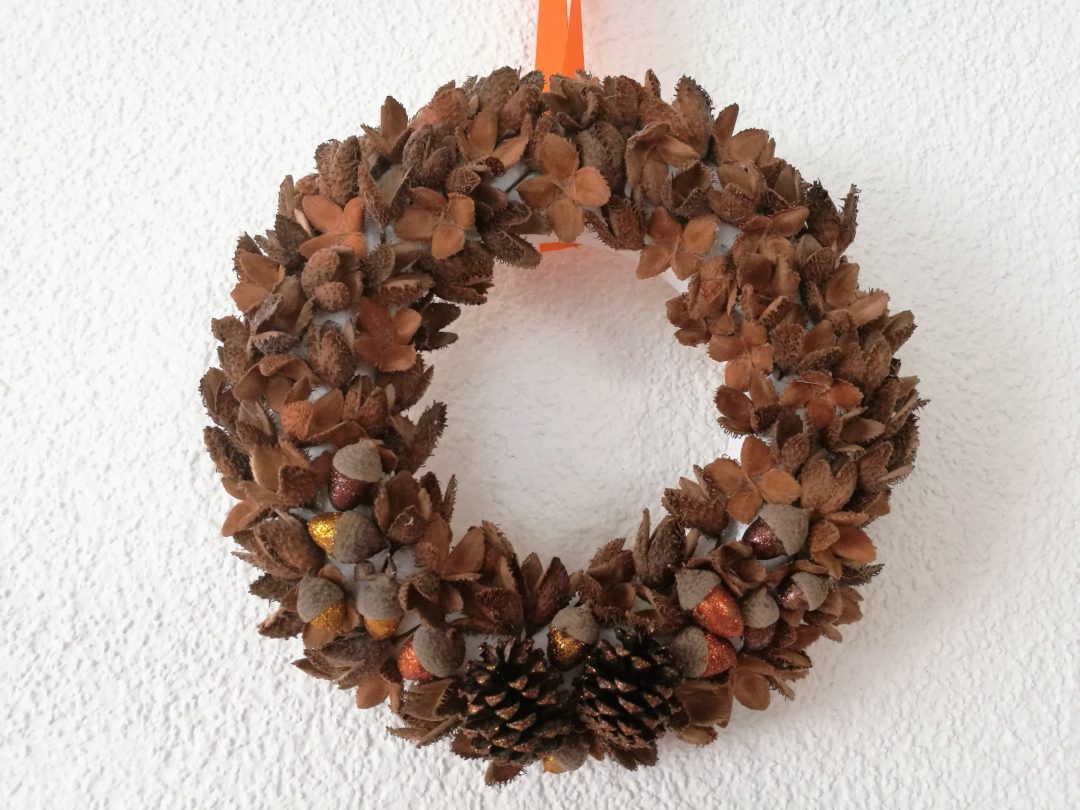
In today’s post you will find a simple guide how to make a fall wreath from natural materials. I didn´t think I would start making fall decorations so early this year, but when I sorted a box of materials for DIY, I discovered a bag full of beechnuts. I totally forgot to have them there. We gathered them last year when our parents were here to visit us, and when we walked from Gurten, the nuts literally fell on our heads. And I started throwing them into the stroller basket with the fact that they would definitely come handy some time! And they´ve come 🙂
Supplies:
- wreath form (I used polystyrene 20cm in diameter)
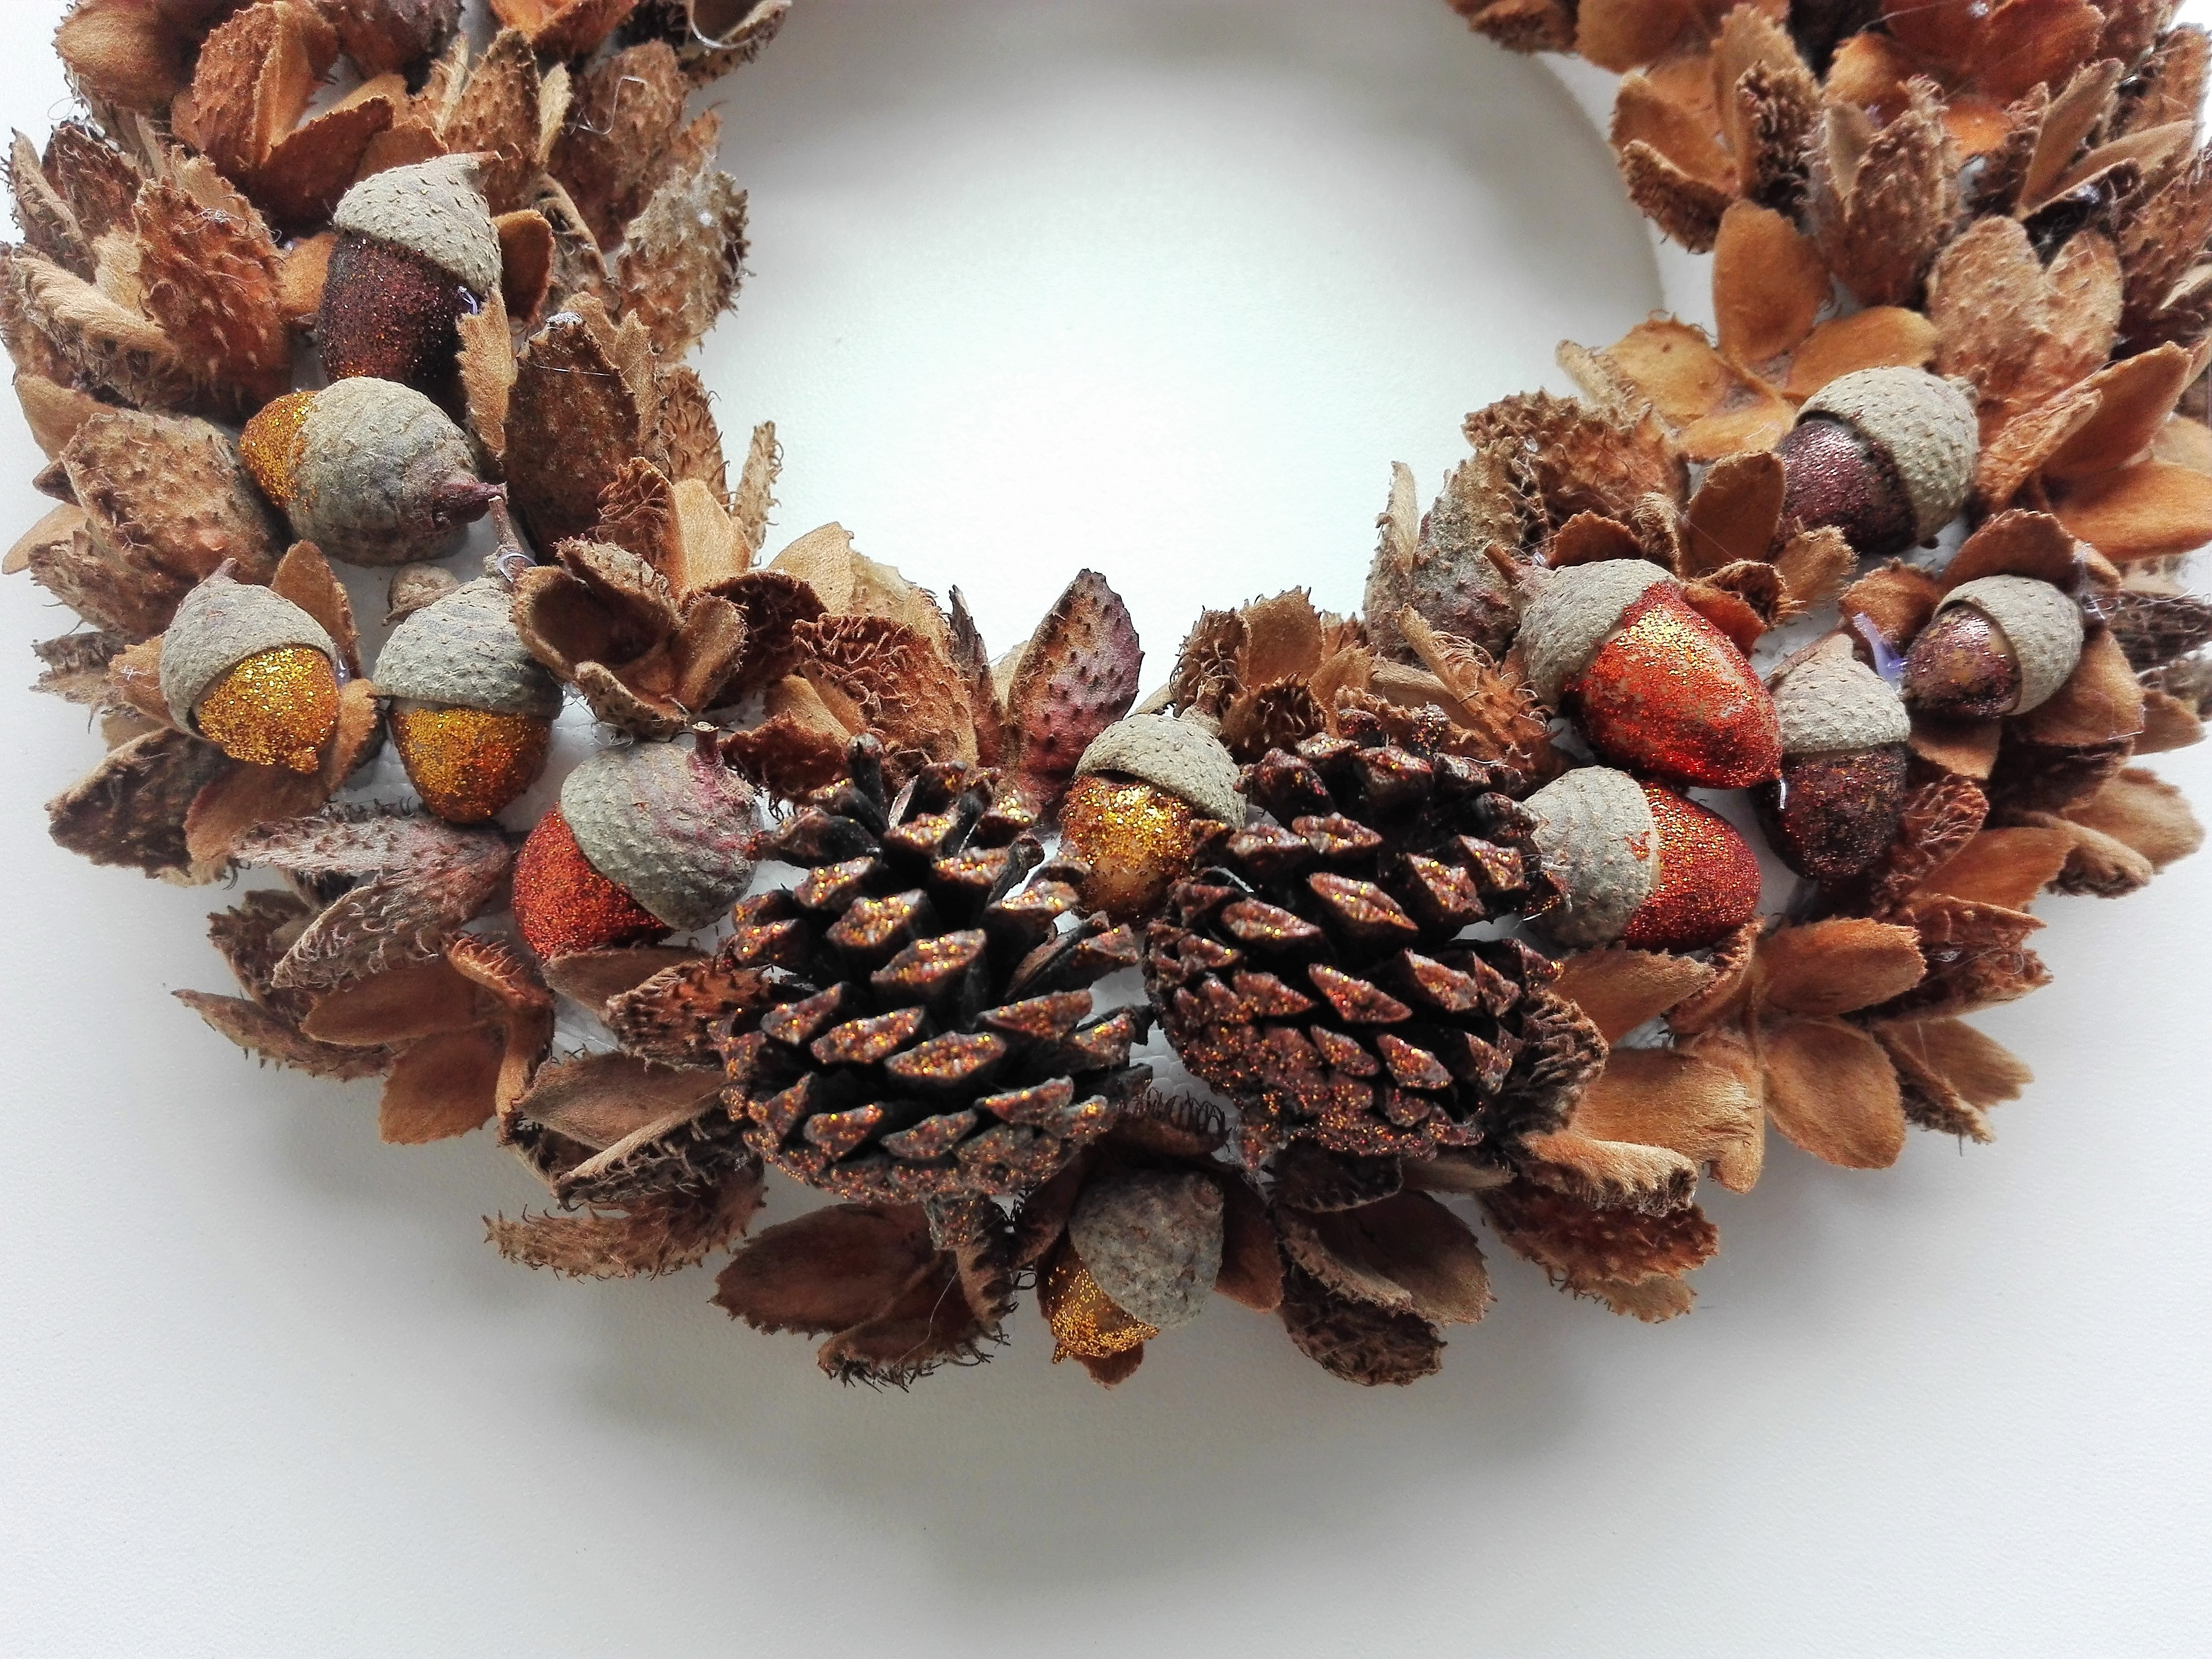
- beechnuts (about half a smaller plastic bag of empty “cups”)
- other natural materials (cones, acorns, chestnuts)
- hot glue gun & silicone sticks
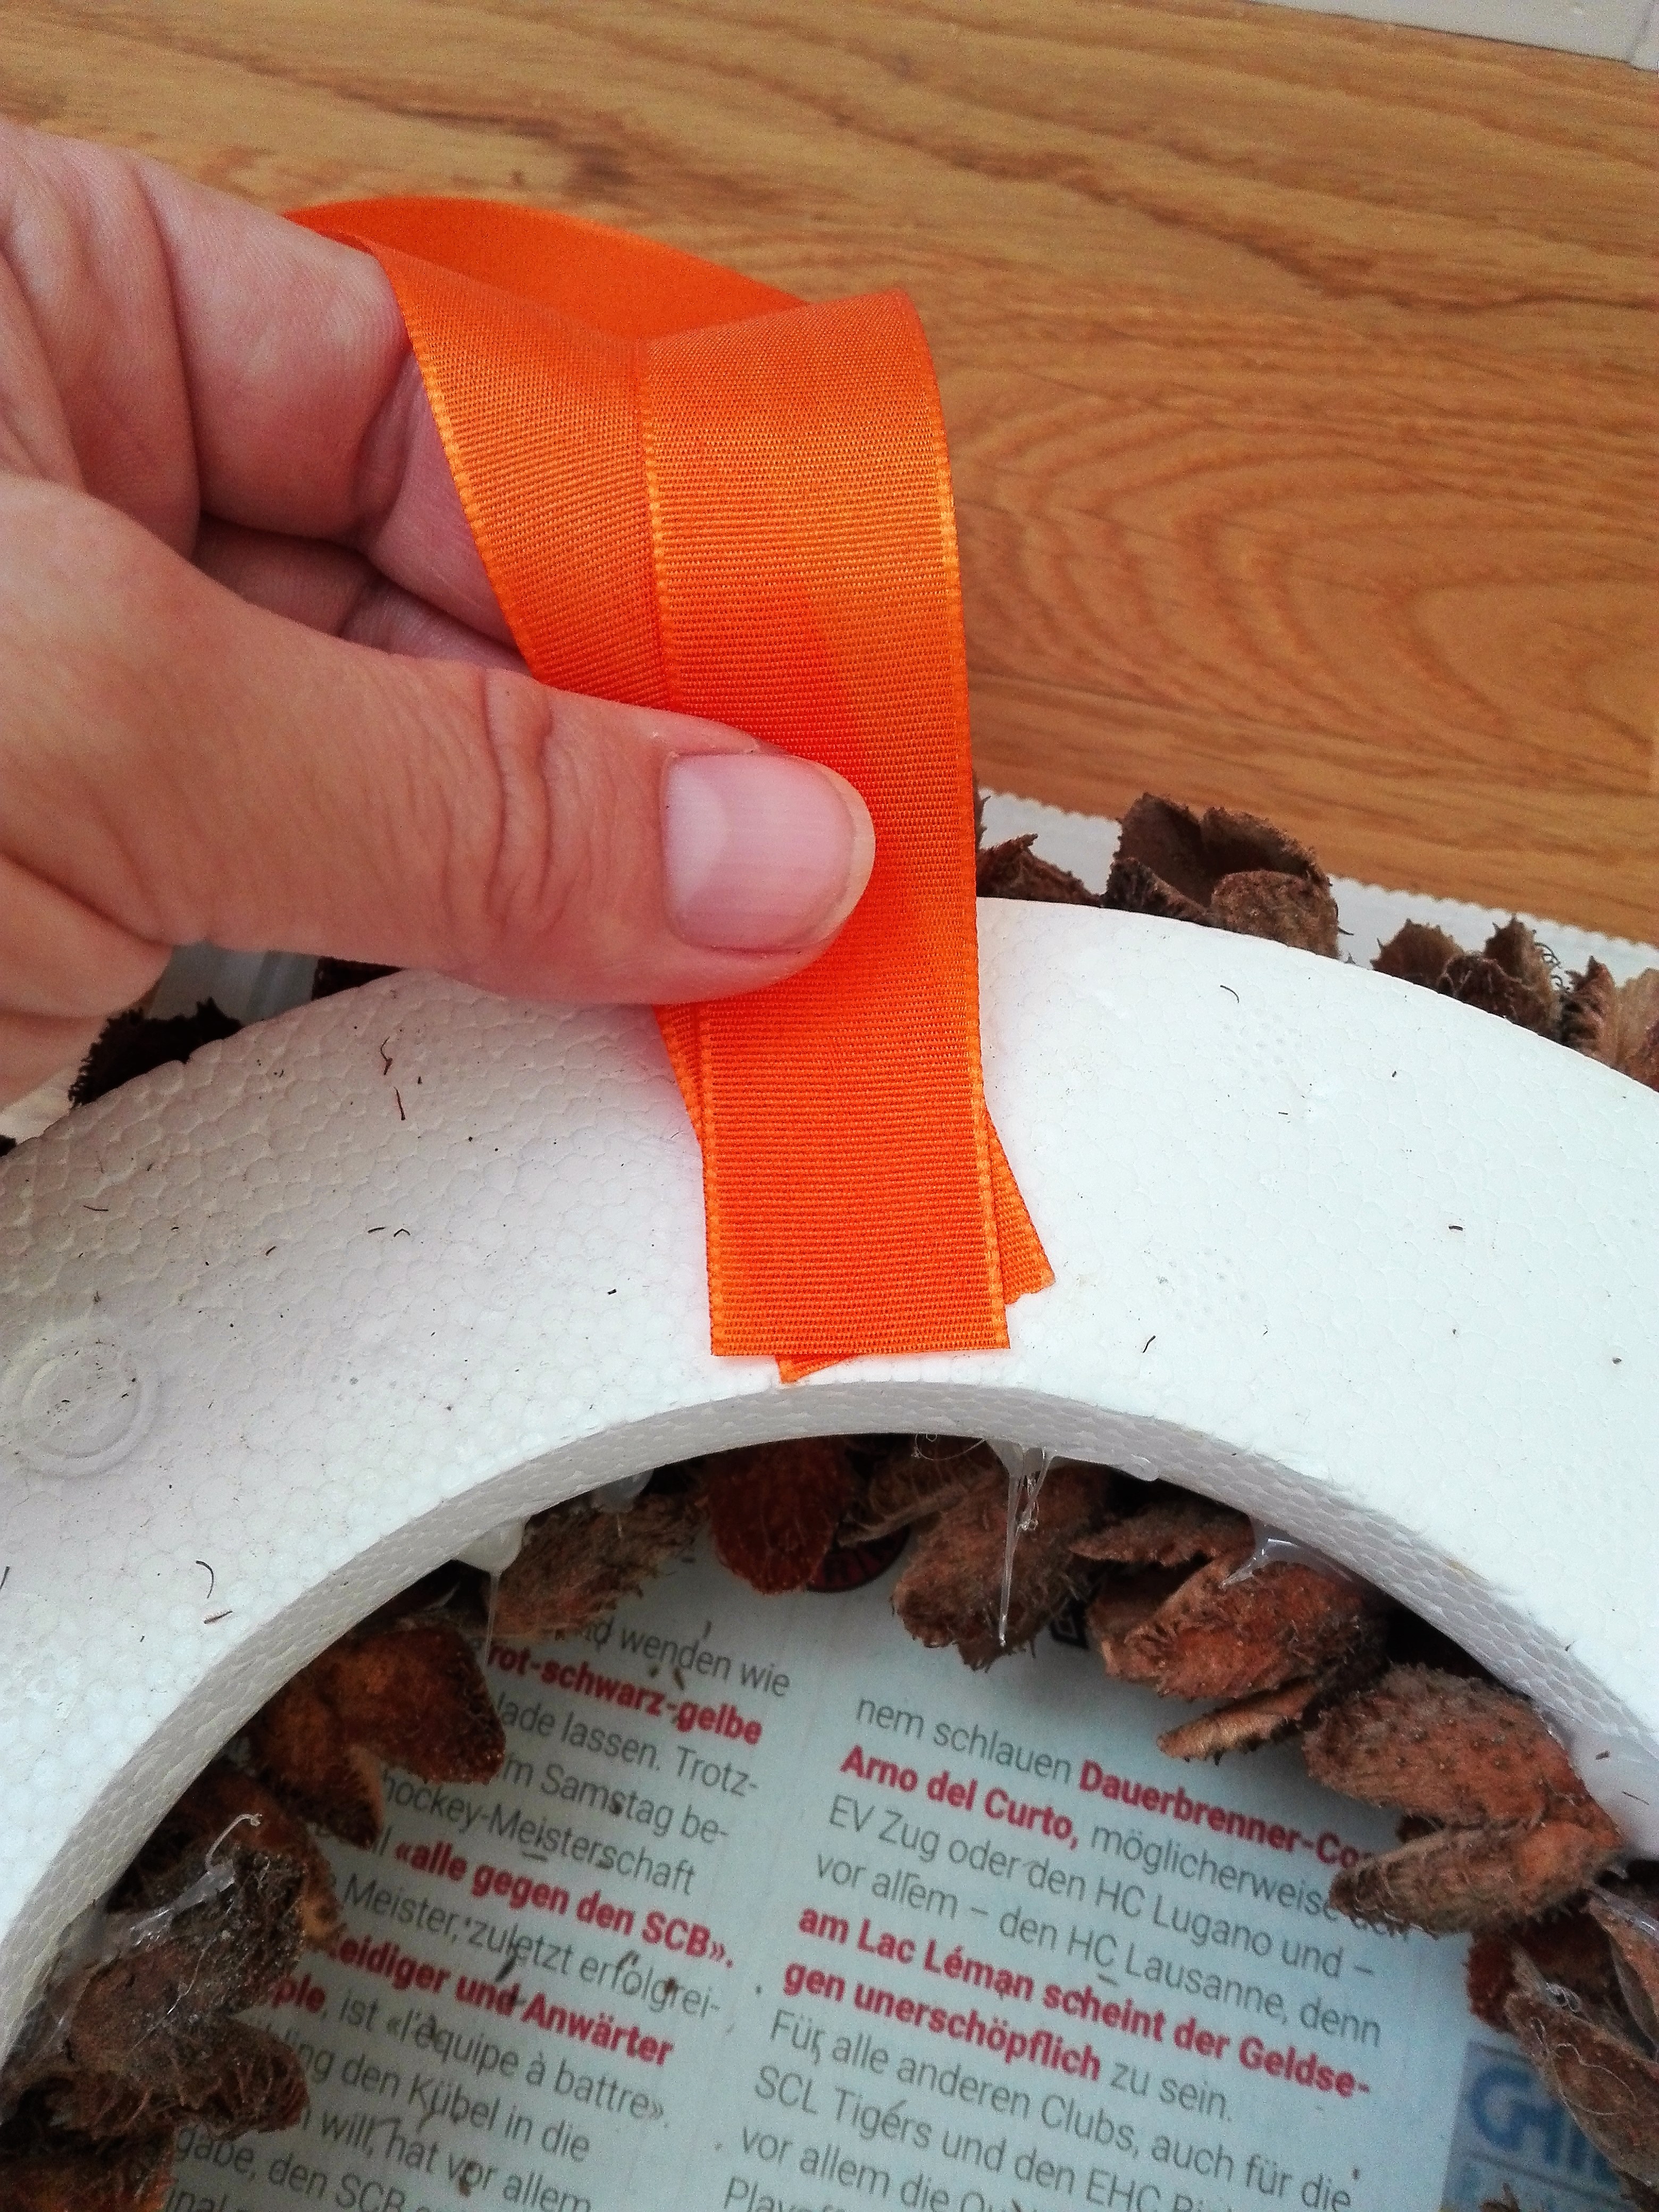
- ribbon

Step 1
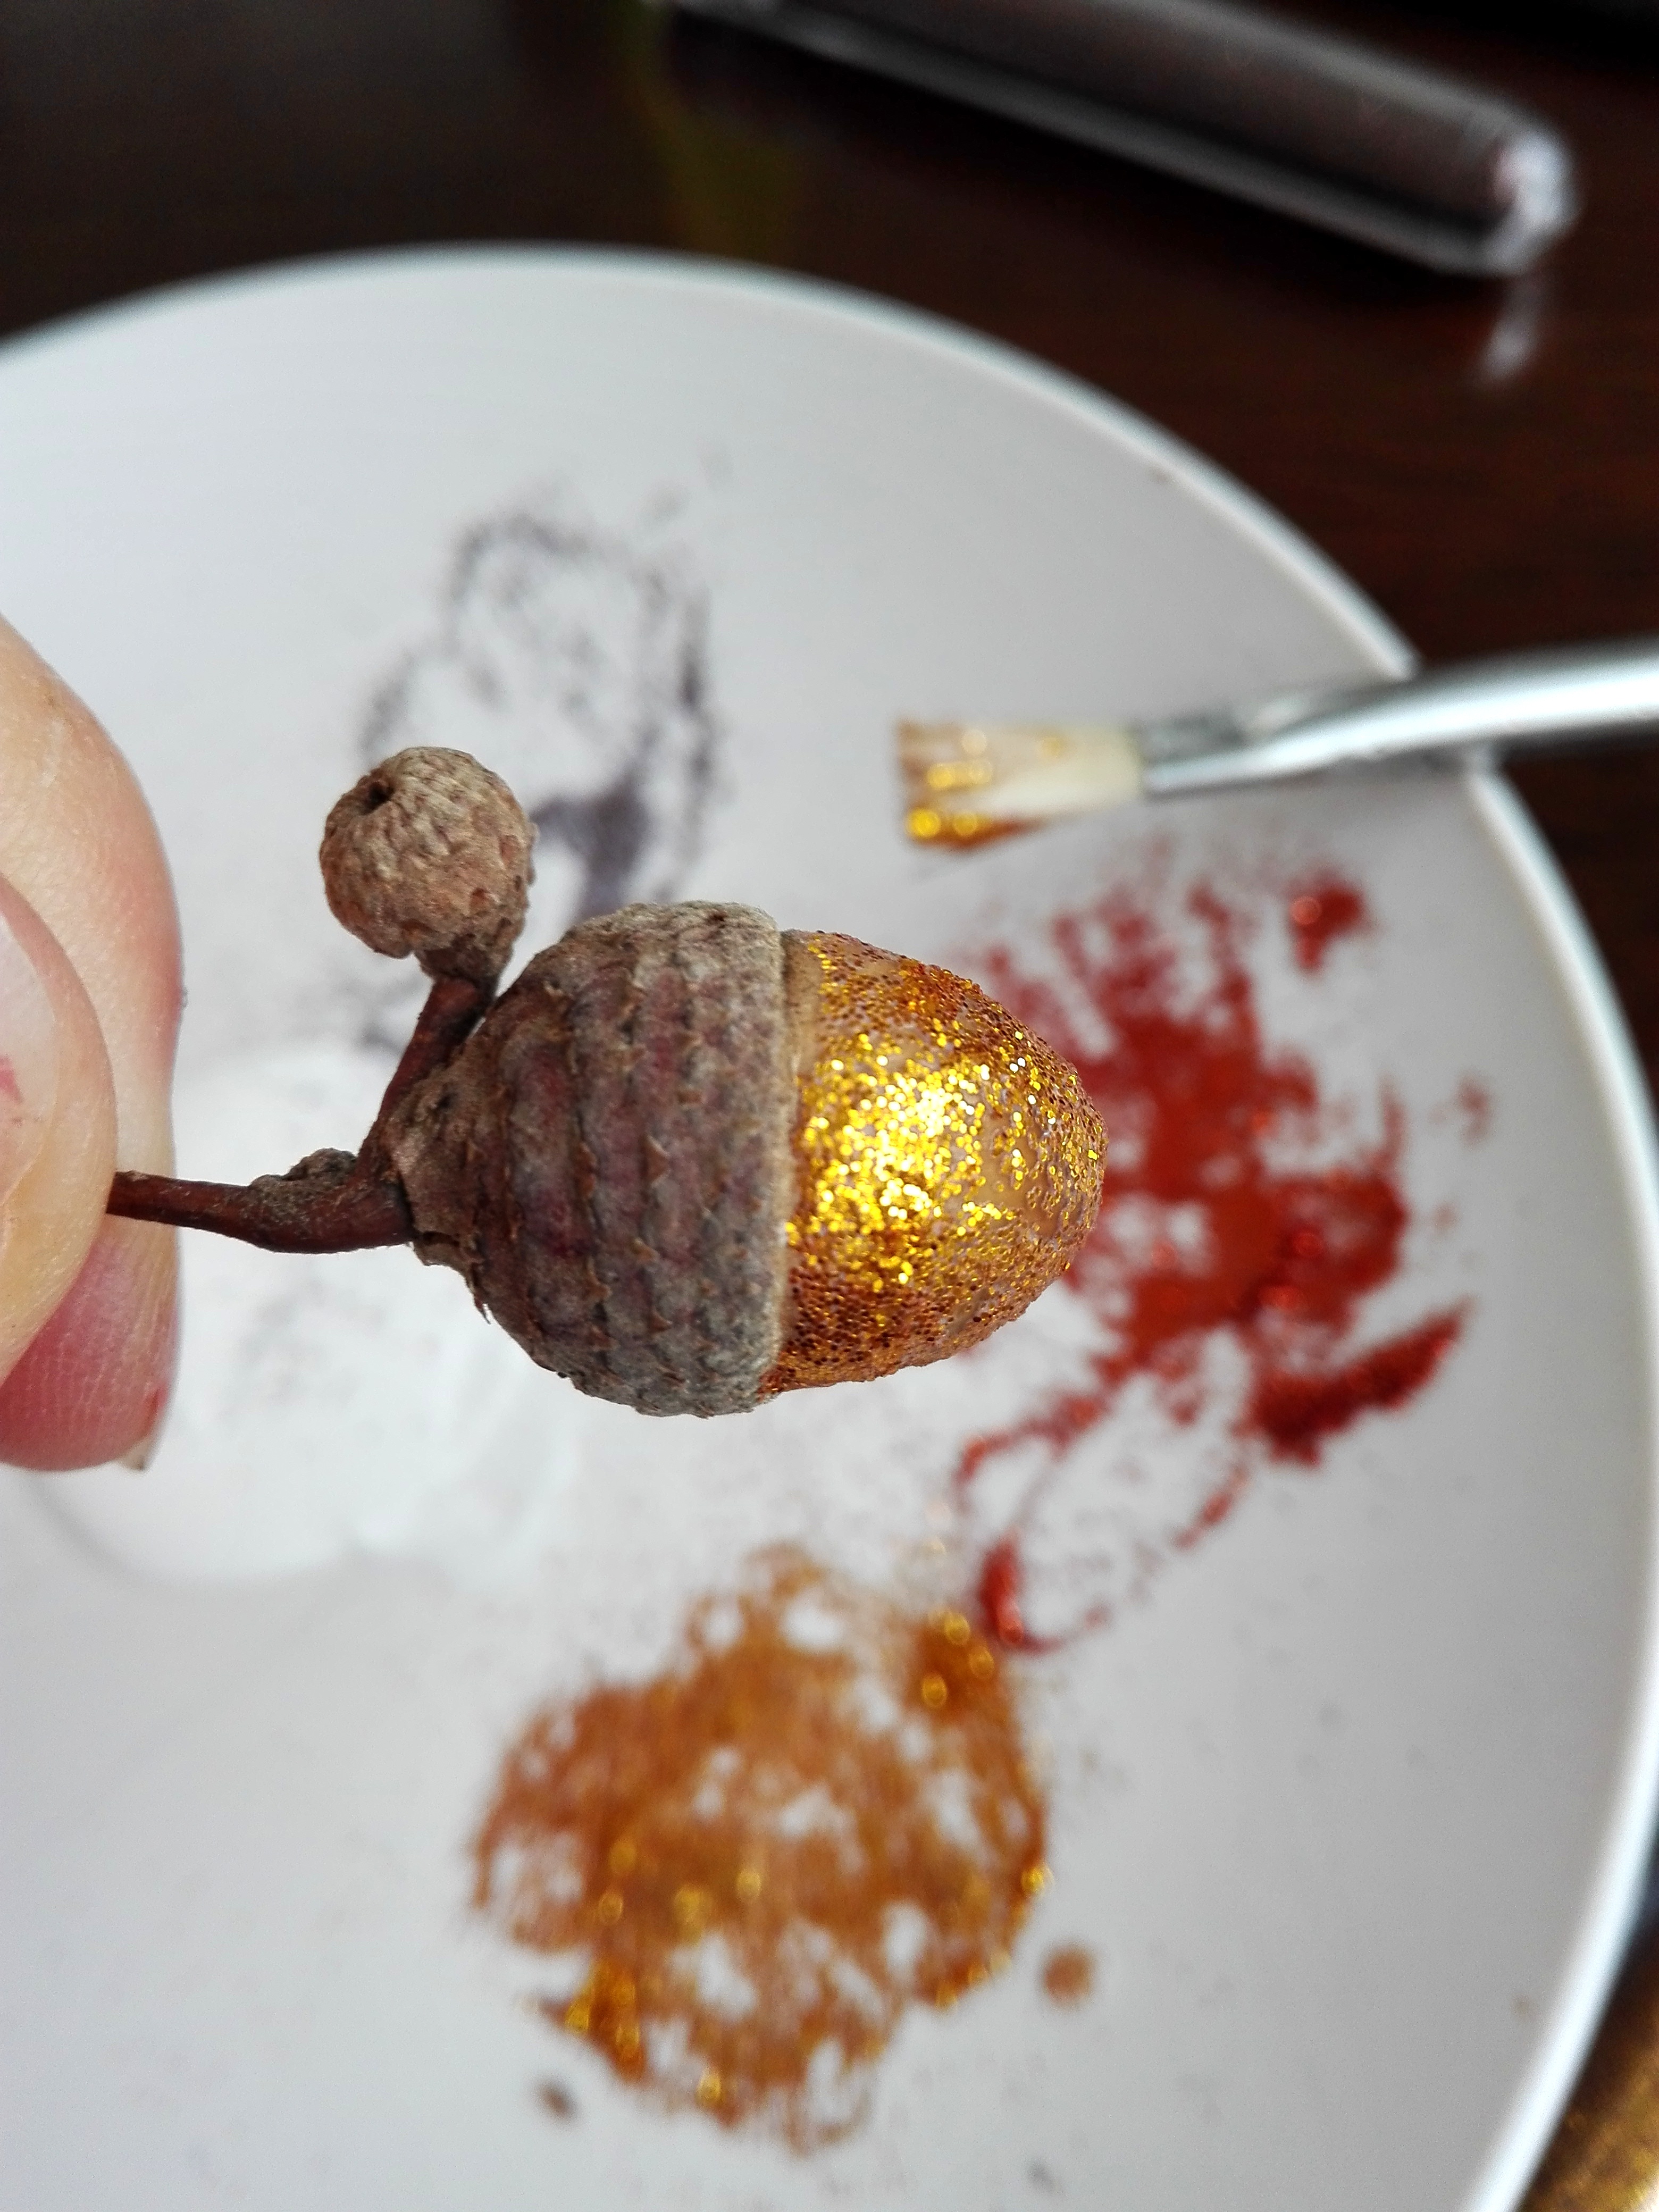
If you would like to decorate acorns or cones with glitter before you start making the wreath itself, you can find a tutorial how to do that in my last year´s post – here.
Step 2
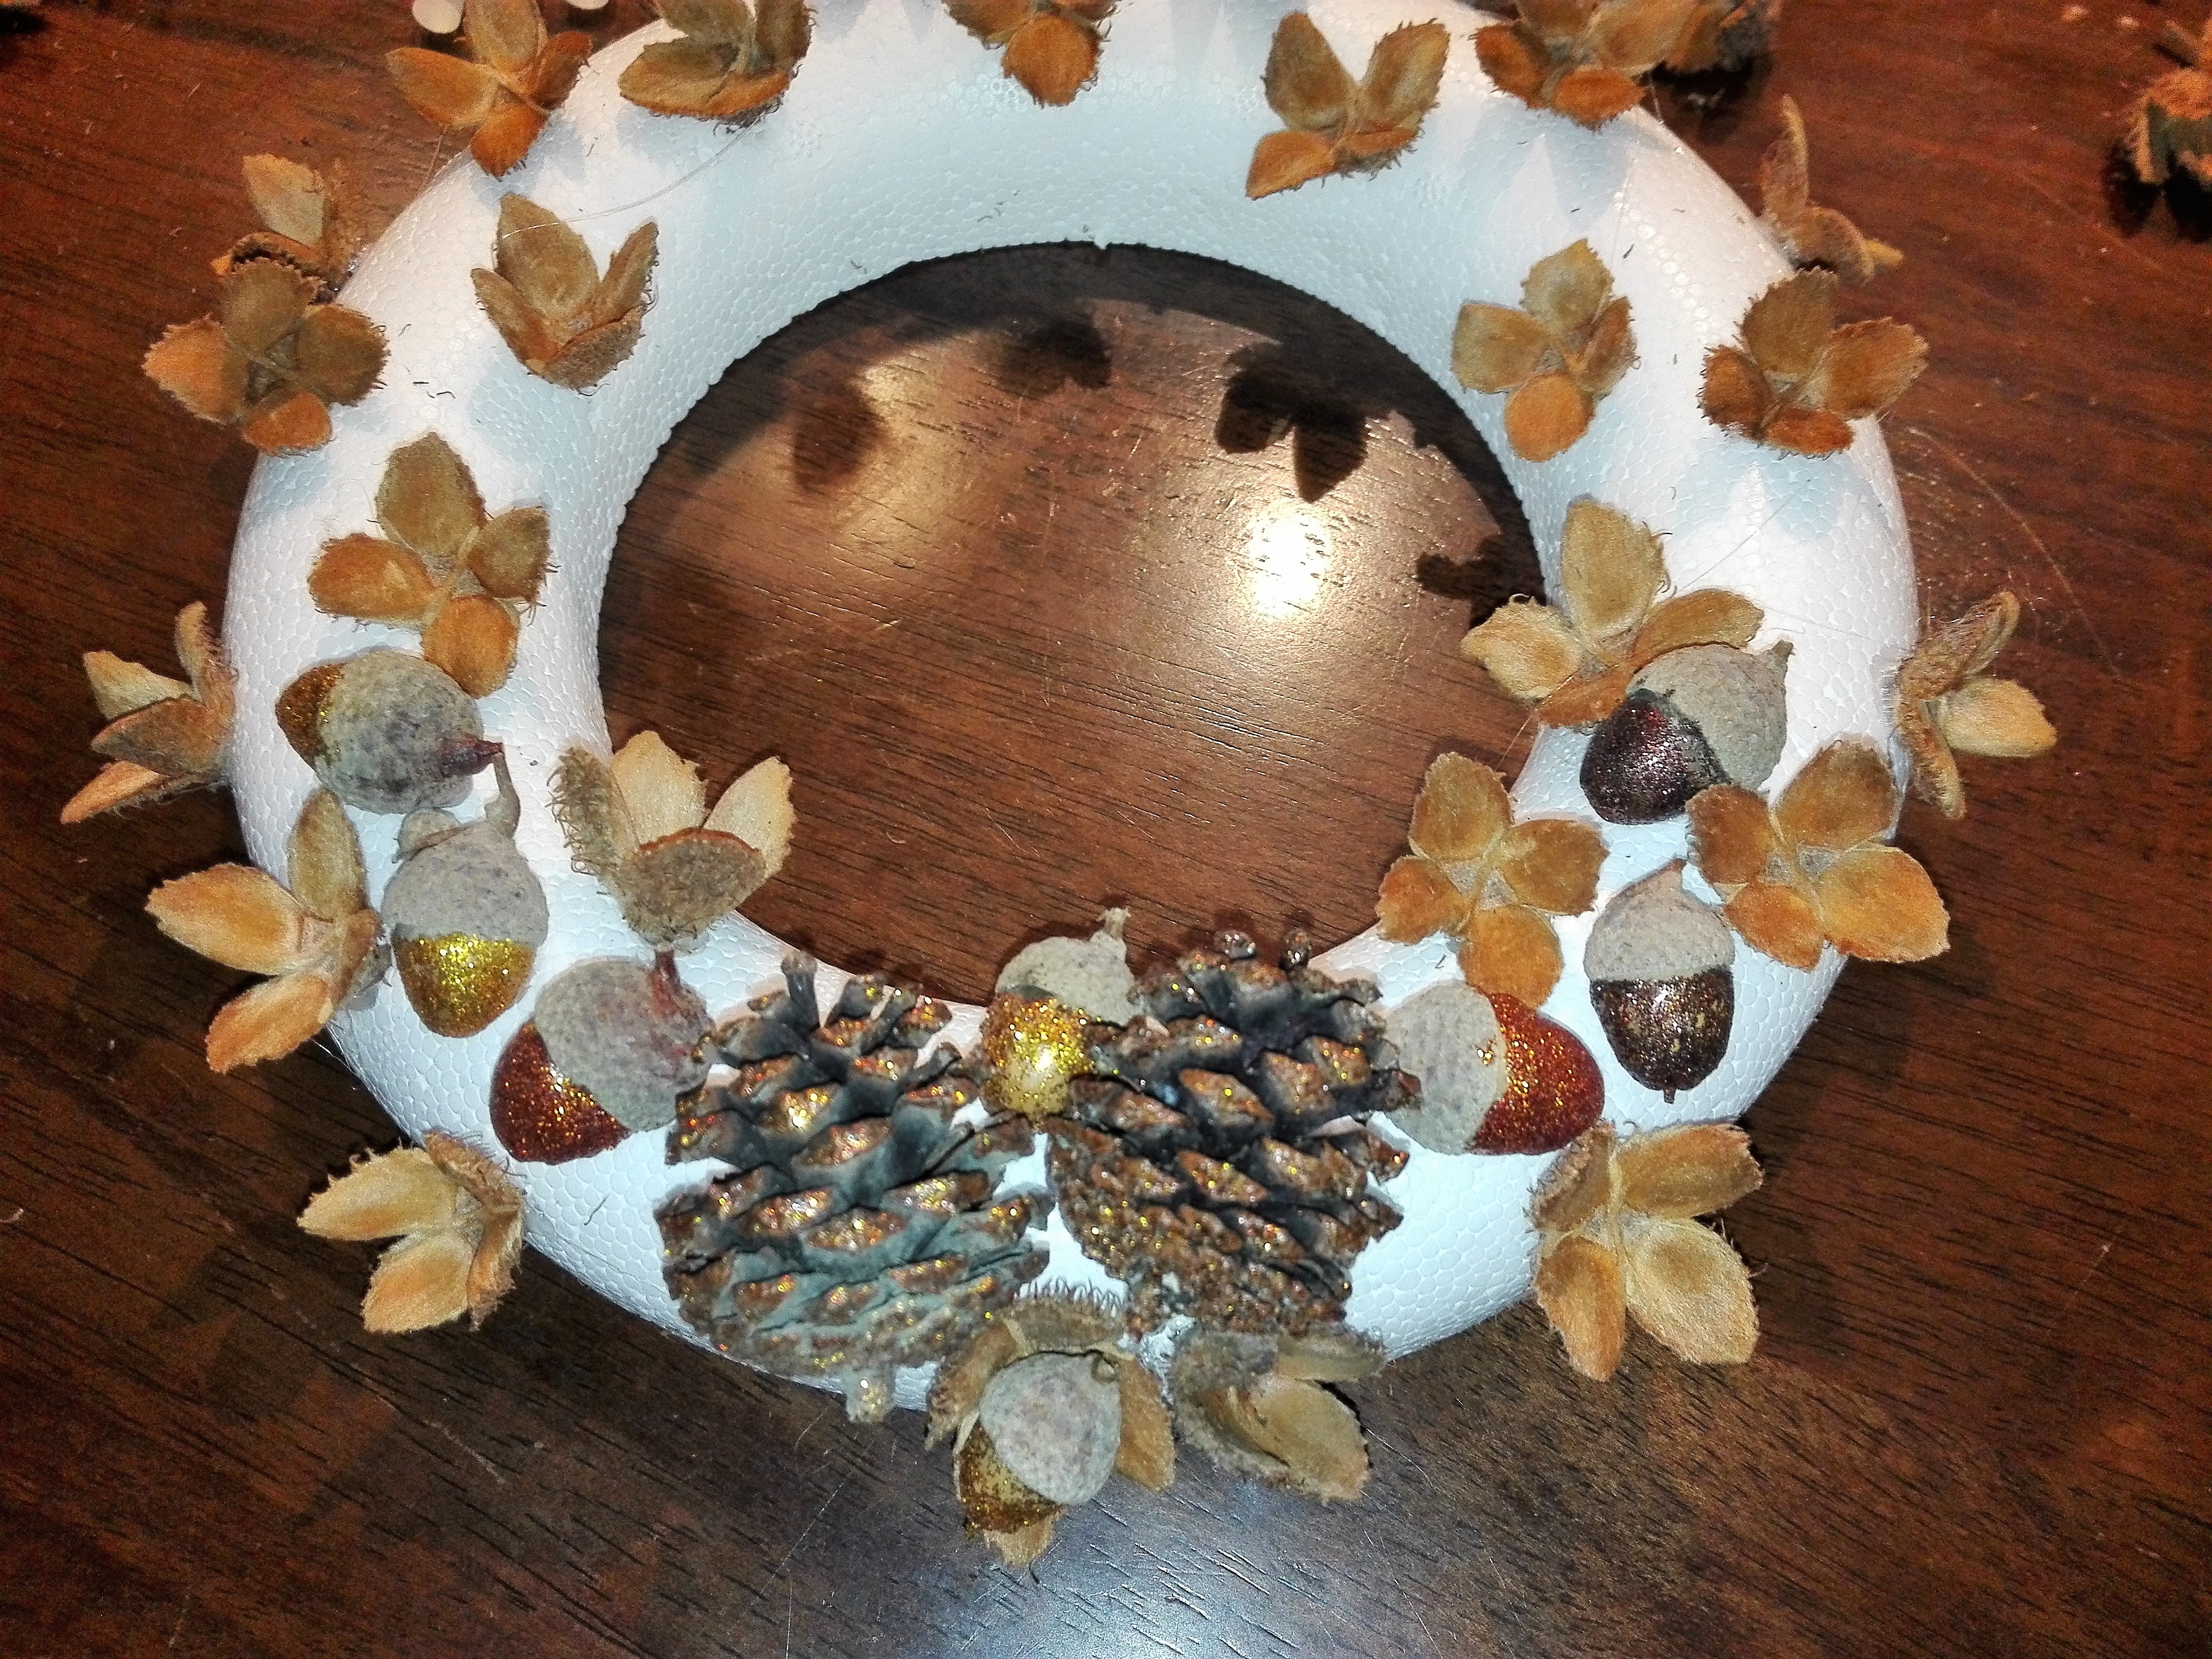
I put aside the most open cups. Then I stabbed them evenly into the form. For better fixation, I also used the hot glue gun.

Step 3
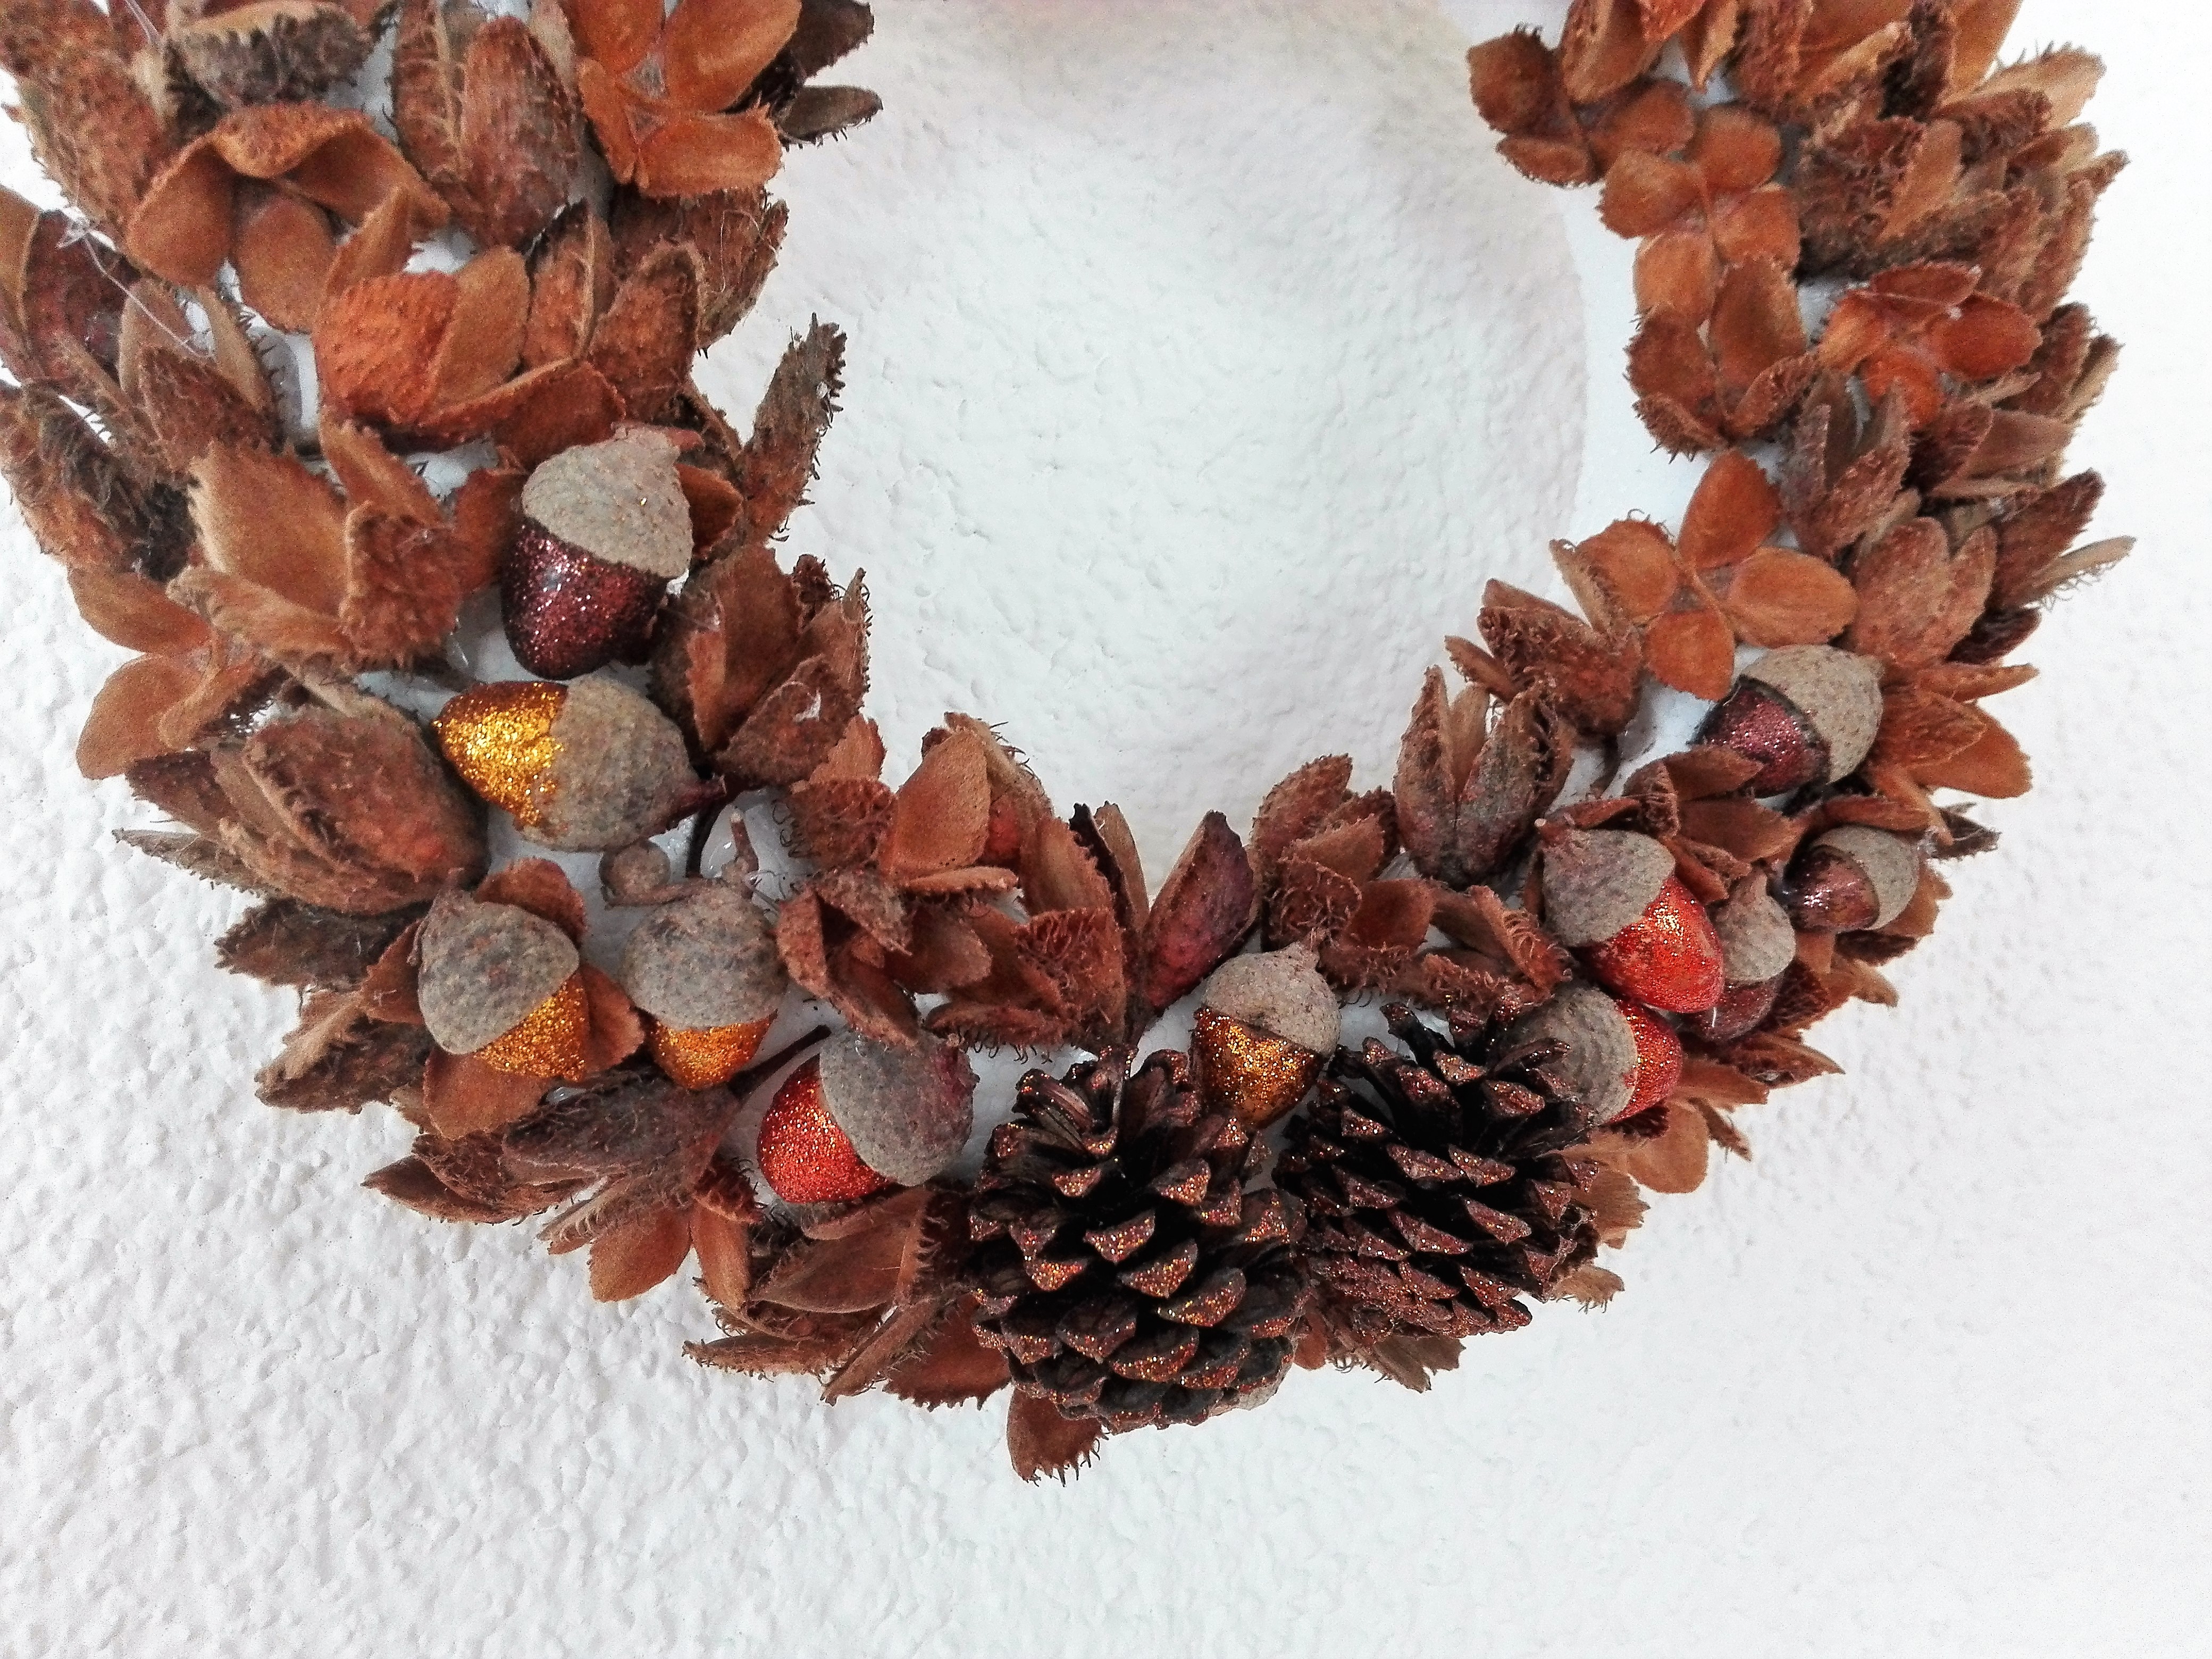
Gradually, I added and glued cones, acorns and more cups. It’s really good to have them all shapes and sizes because the smaller and finer nicely fill the space between the others.

Step 4
As the last step, I glued a ribbon on the back side of the form. And then I could hang the wreath. I picked for it a place on the wall between the kitchen and the living room. I think it fits exquisitely there.
Do you also like fall? Are you looking forward to the color game all around? For me, the autumn is a time when I’m going to bake again. I am already looking forward to the fragrance of this year’s first apple strudel. Have a fantastic fall!


12 Comments
Trish
14.9.2017 at 13:22I love love love this wreath! I’m gonna have to share this with my niece, she has recently started making them for her home. Need her to make me one of these!! Also I just looked up and seen a Chestnut wreath that you post back in January of last year, that is fabulous as well!!! Such a great idea to use chestnuts!!!
Hanka
14.9.2017 at 21:26I´m glad you liked my wreaths! I hope your niece will enjoy making her own wreath!
Emily @ Pizza & Pull-Ups
14.9.2017 at 13:25What a lovely wreath, I like that you used all found materials.
Hanka
14.9.2017 at 21:27Hi Emily, thanks for your comment. I prefer using natural materials to artificial 😉
Vanessa
14.9.2017 at 13:27What a wonderful fall project! Will have to give it a try!
Hanka
14.9.2017 at 21:29Thanks, Vanessa, I hope your wreath will turn out well! Have a fantastic fall!
yvette
14.9.2017 at 16:22Your ideas are so beItiful. I am pinning this and will attempt it!
Hanka
14.9.2017 at 21:30Thanks Yvette for pinning 😉 It always helps to get my ideas to other DIY freaks 😉
Corey | The Nostalgia Diaries
14.9.2017 at 19:03I just love those gold acorns. This is beautiful!
Hanka
14.9.2017 at 21:30Thank you very much, Corey! Have a great fall!
Marissa
14.9.2017 at 20:48I love this wreath! I love how you glittered the acorns. 🙂
Hanka
14.9.2017 at 21:31Thanks Marissa for your nice comment. I really appreciate it!