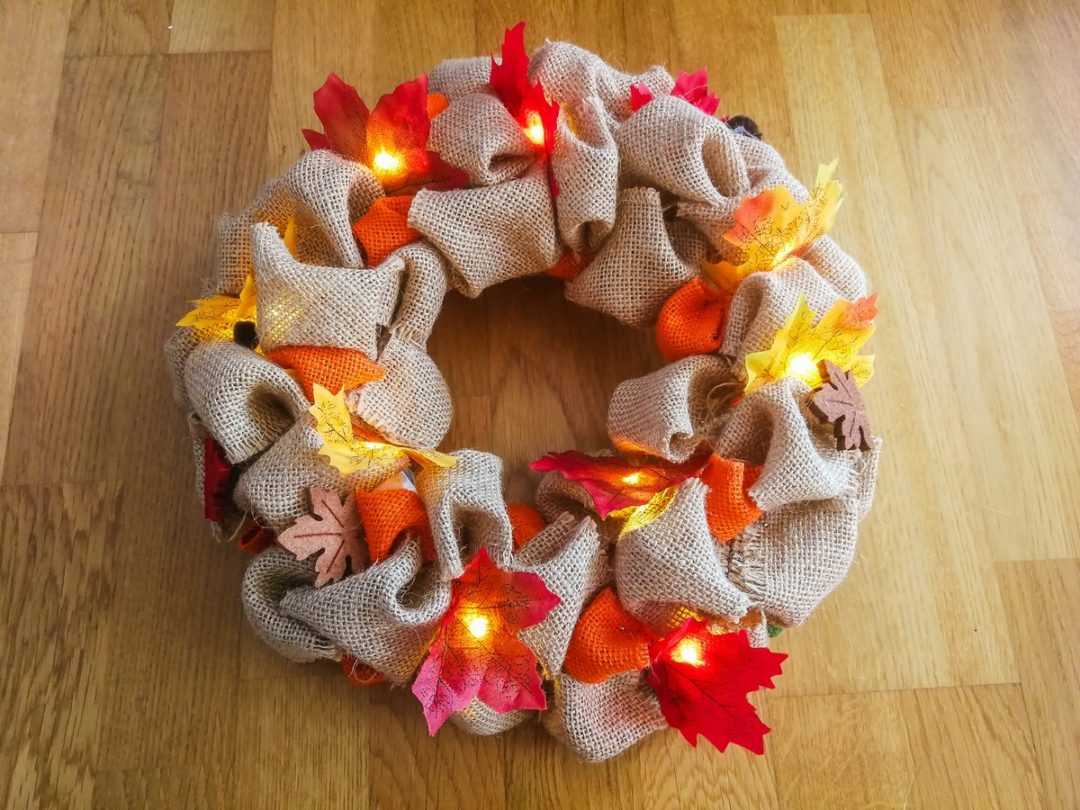
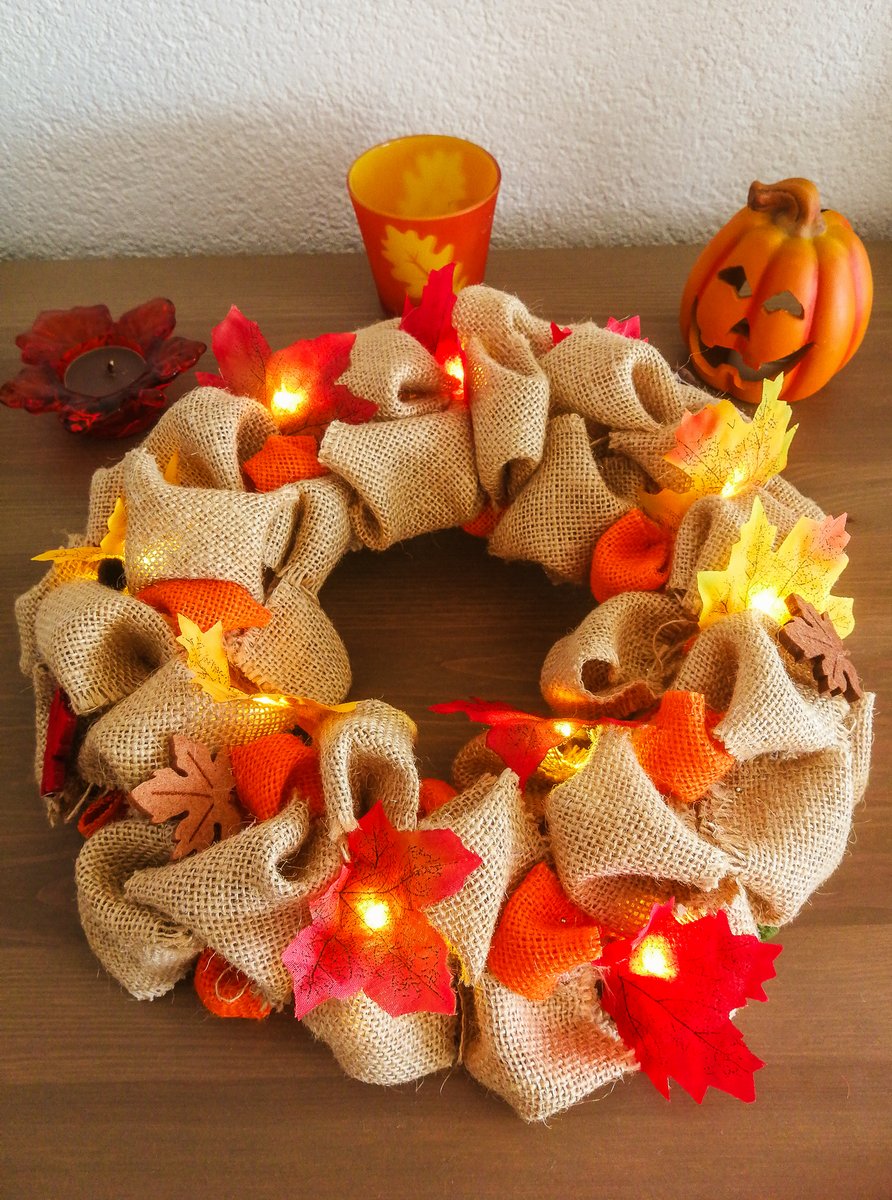
Upcycling. Or making the old new. As much as I like to buy some new fall decor sometimes, I want to think even more about how to use what we have at home. So I thought I’d take apart the fall burlap wreath I made the year before last and try to transform it a bit. In this post, I’ll show you how I went about it, and I hope you like the result.
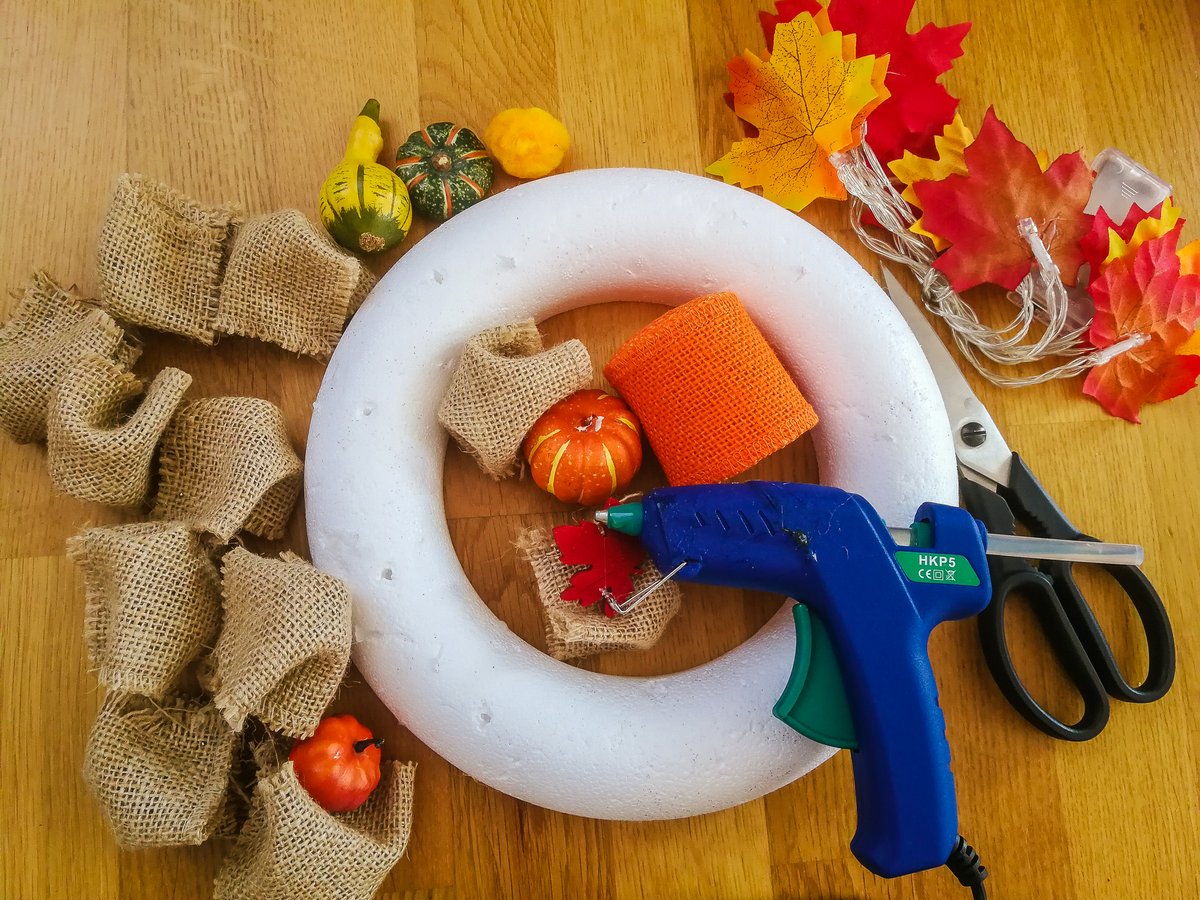
Supplies
If you already have a burlap ribbon wreath at home, you have all this supplies already. If not, and you want to make a brand-new one, you will need:
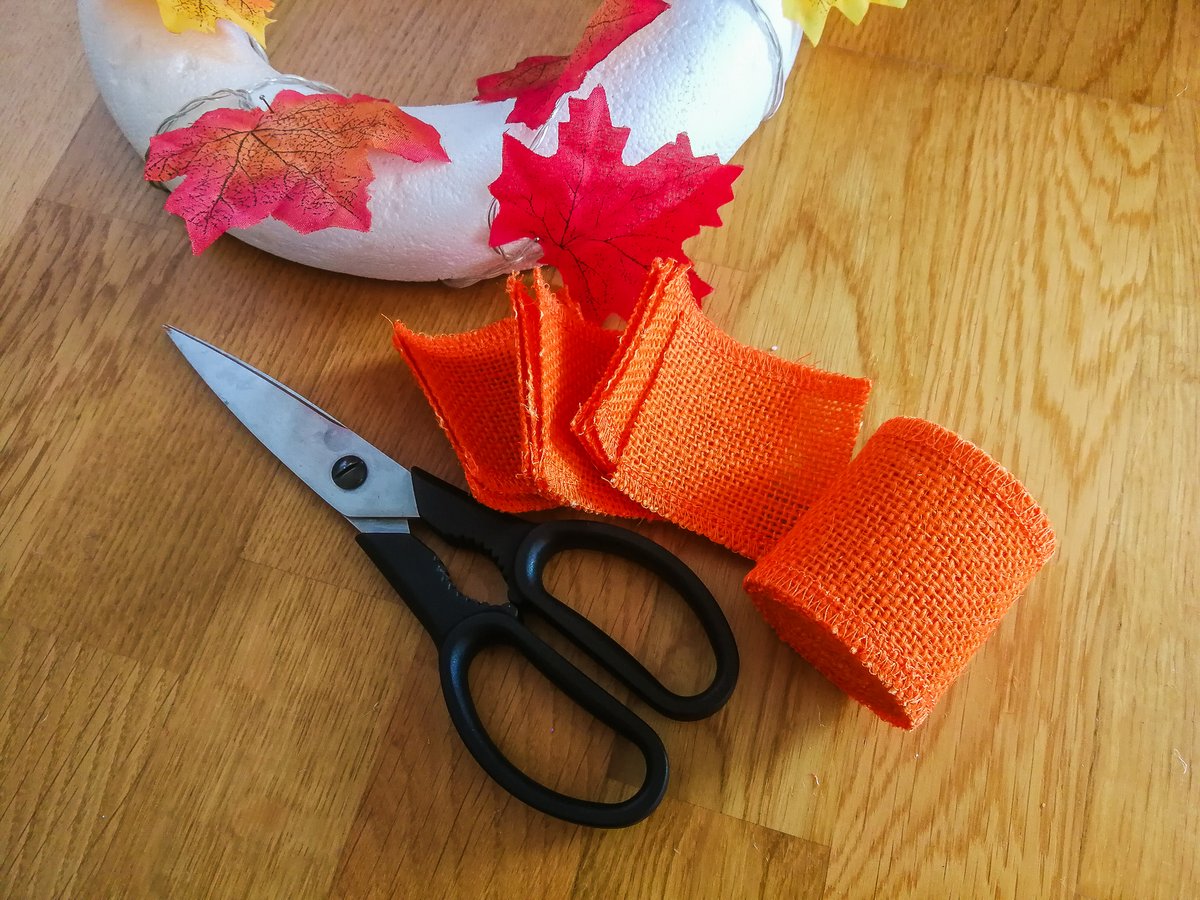
- Foam wreath form (25cm diameter)
- Natural Burlap ribbon (length: 5m, width: 10cm)
- Orange Burlap ribbon (width: 5 cm)
- pins with small heads
- Hot glue gun & glue sticks
- Scissors
- Small decorative items (pompons, pumpkins, leaves…)
- 1.5m long LED lights in the shape of maple leaves (ordered via eBay), AA batteries for lights if not included
Step-by-step tutorial
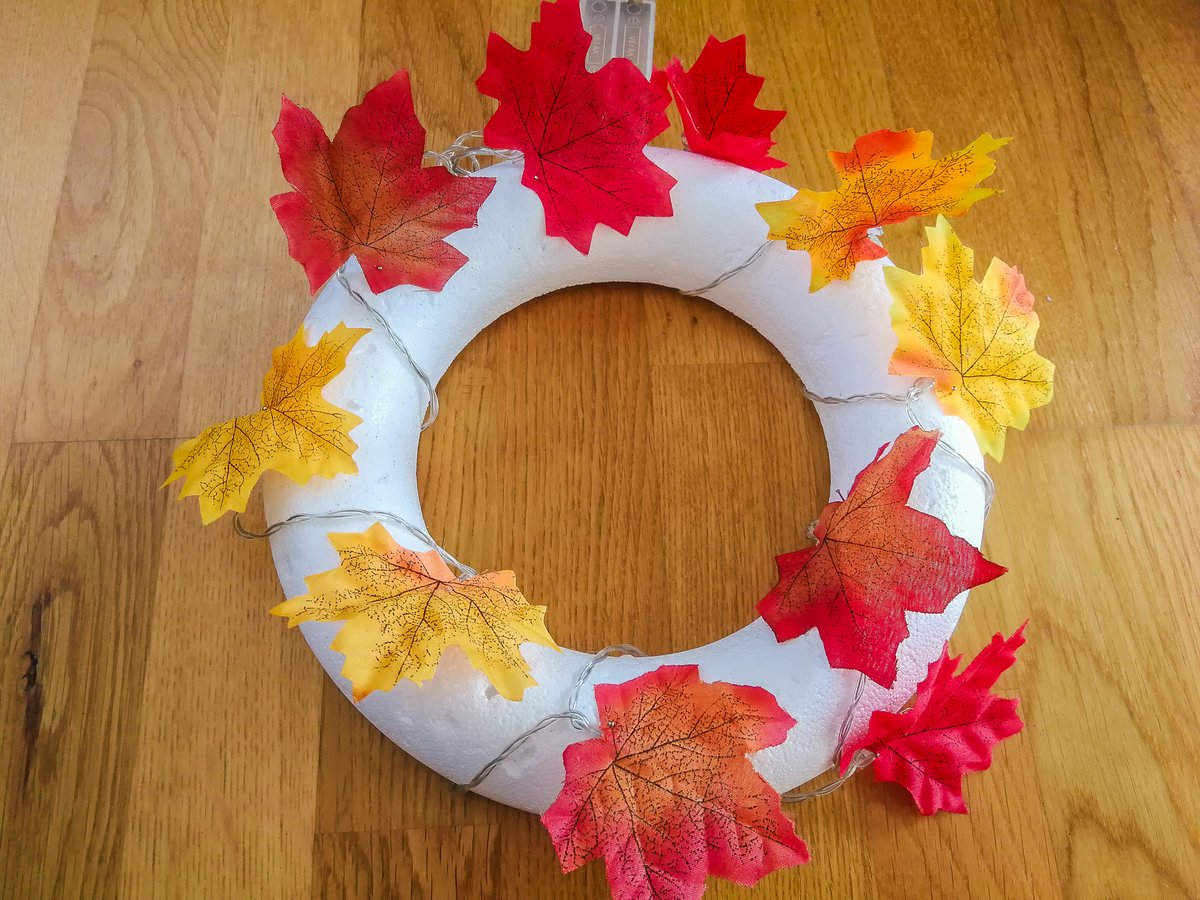
Read moreStep 1
Wrap the LED lights evenly on the body of the wreath, using a pin if necessary.
Step 2
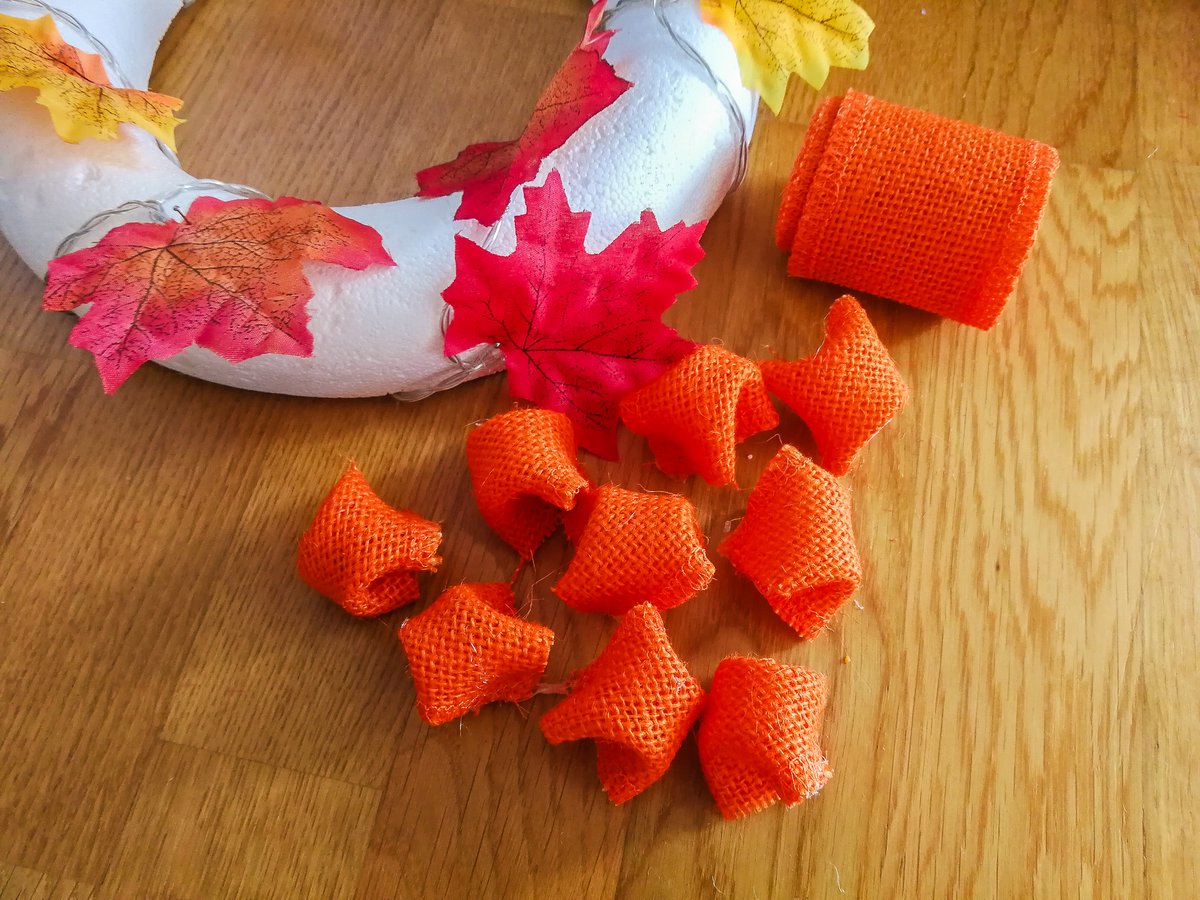
A detailed description (including photos) of how to create jute bubbles can be found in this Easter Wreath tutorial. The procedure is straightforward: cut the ribbon into 10x10cm squares. Take each square, fold it corner to corner to make a triangle, put a little hot glue, and stick together. Bring the sides together – put a pinch of glue to each corner, and fold both sides towards the center of your triangle – and here is your bubble.
Step 3
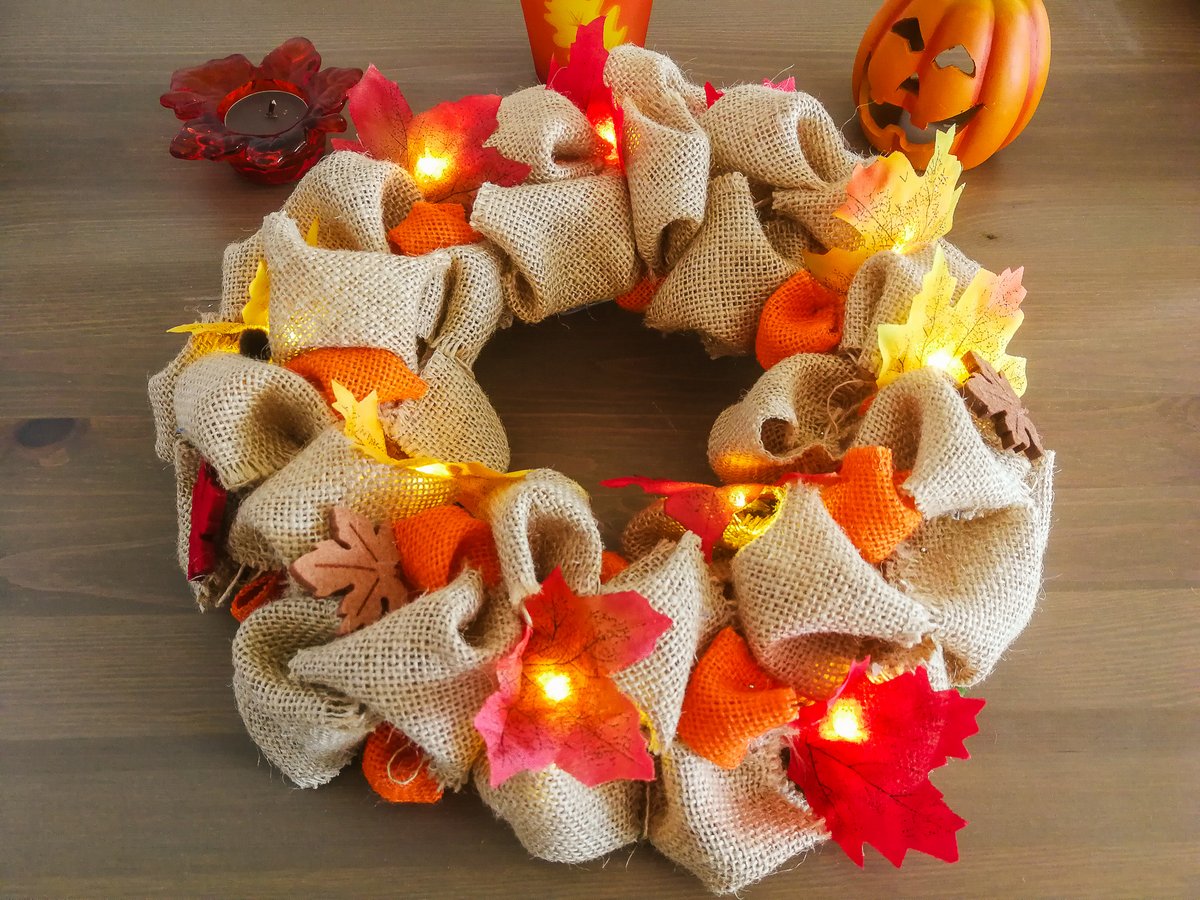
Pierce the pin through the bottom end of the bubble and pin the “bubble” to the polystyrene body of the wreath. Continue until you have covered the entire body. If the body of the wreath shines through in places, just “fluff” the bubbles or lightly cover them with LED light leaves.
I didn’t add too many other decorations to the wreath, as the large colored leaves from the lights and the colored ribbon already made it look pretty decorated. But it’s a matter of everyone’s taste 😉 .
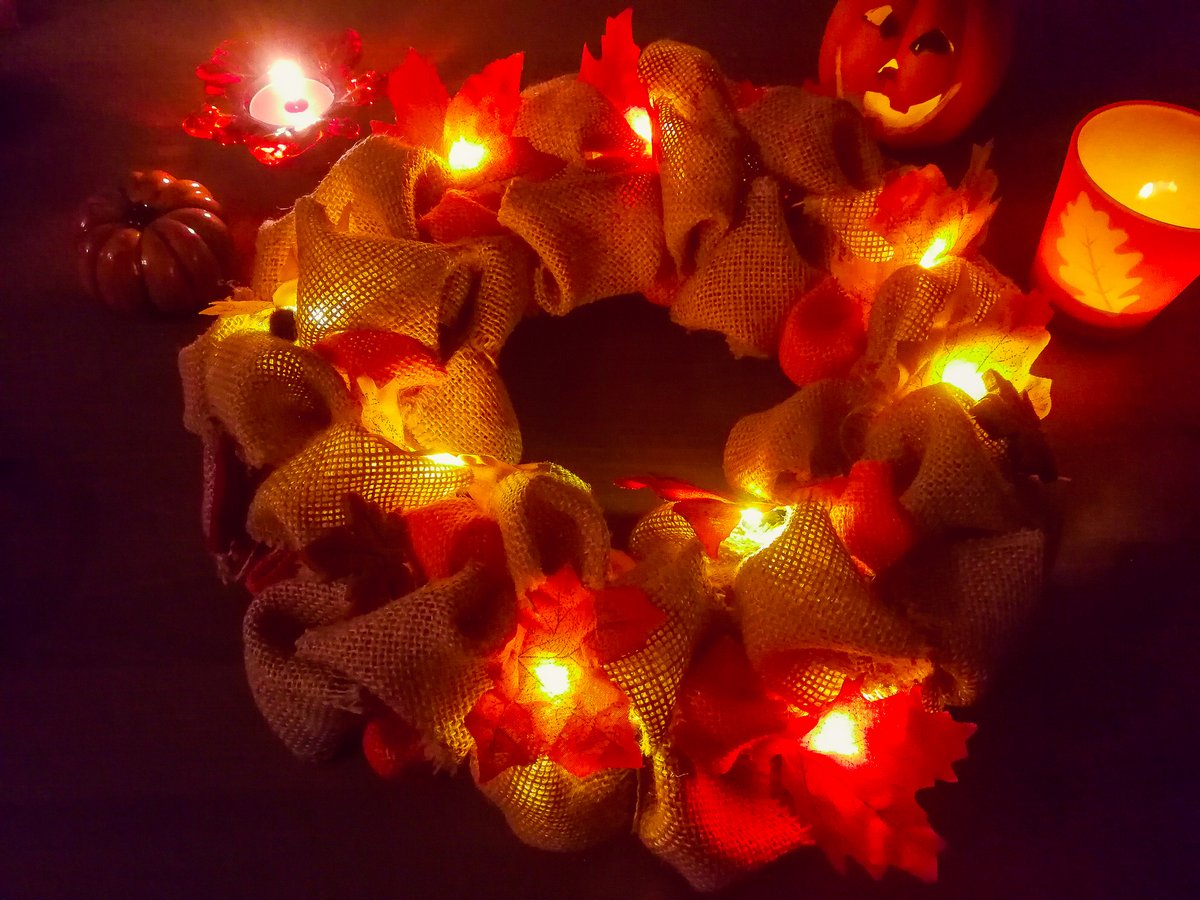
Then, just turn on the lights And enjoy the pleasant autumn atmosphere.
I think that making a wreath from burlap ribbon is not tricky. You can take it apart again and use the bubbles for an advent wreath. What about you? Have you already finished your autumn decorations? If you liked my simple tutorial, don’t forget to share it with others and save it on Pinterest! Thank you 🙂 And have a wonderfully colorful fall!

1 Comment
Burlap Bubble Fall Wreath No.3 - DIY by Hanka
1.9.2023 at 15:35[…] Bubble Fall Wreath Burlap Bubble Fall Wreath No.2 Read […]