
Last year, I ultimately gave up on creating any new fall decorations because of the upcoming move. But this year, I felt the urge to create something new again, especially since I found a lot of unused “fall” material during the move. The idea for another wreath started to form in my head. I bought a few more things, and off I went!
If you want to check out what its predecessors looked like first, you can here:
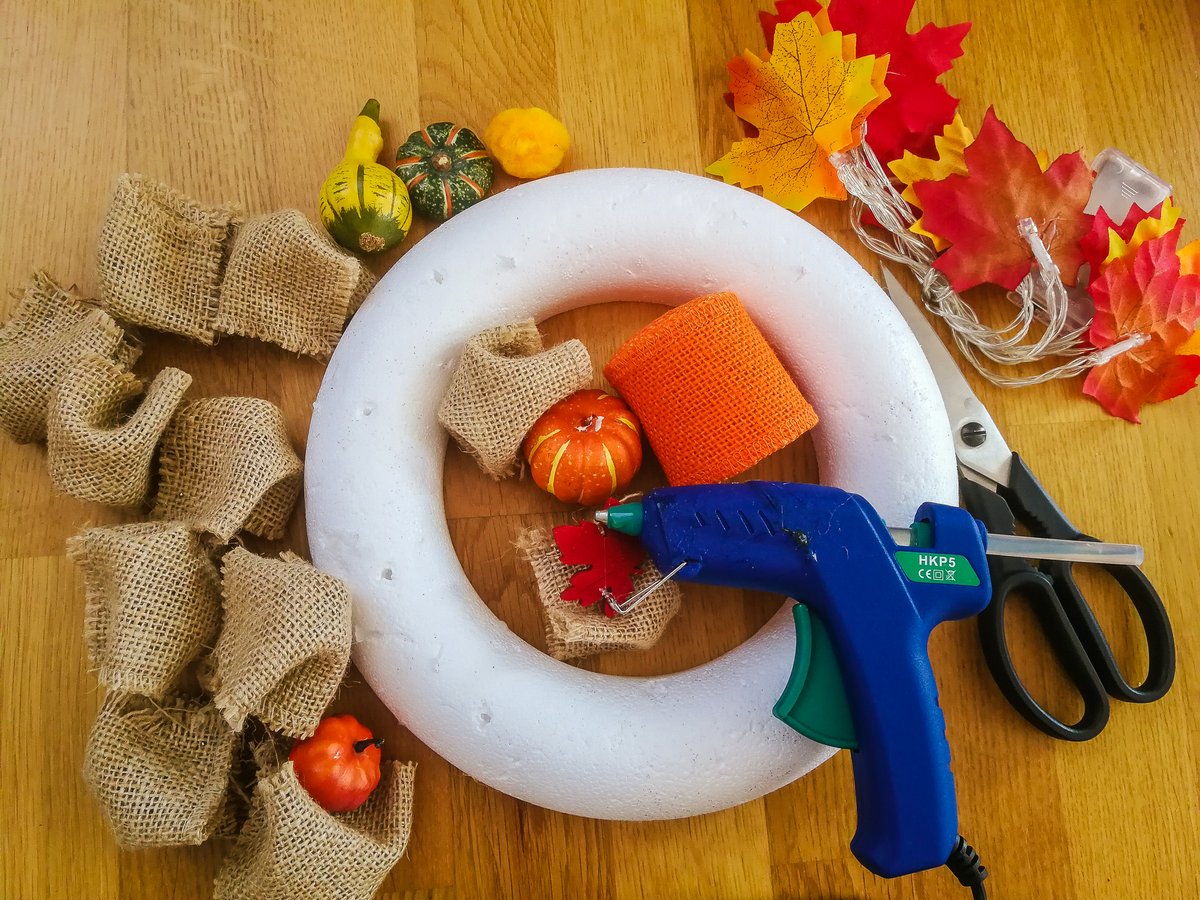
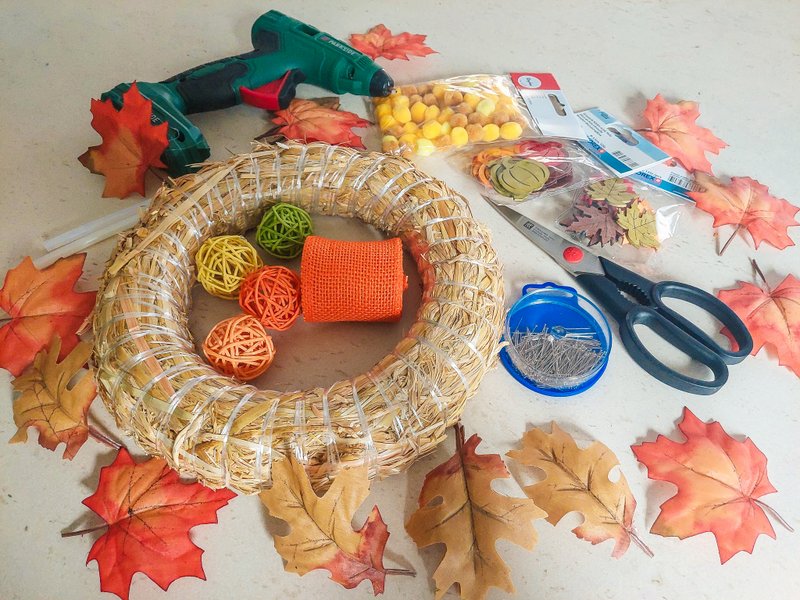
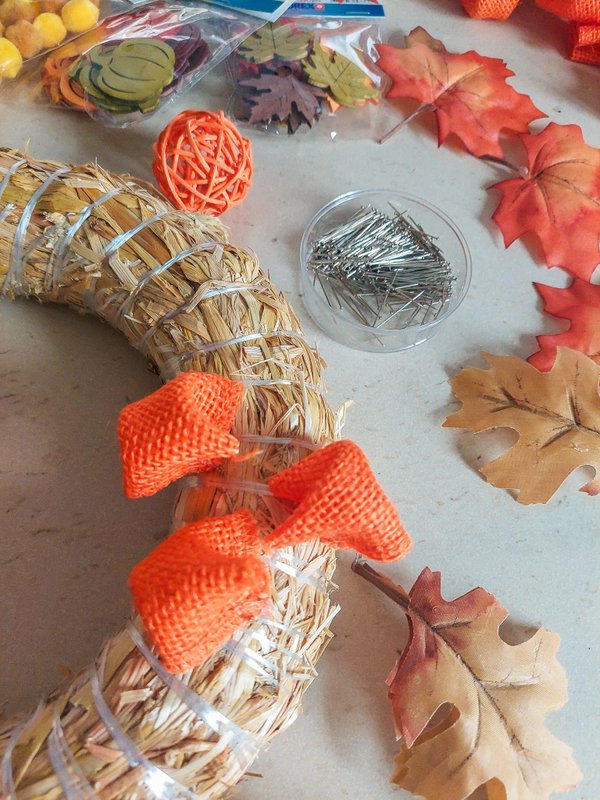
Supplies
- Straw/Foam wreath form (25cm diameter)
- Burlap ribbon (length: 5m, width: 5cm)
- pins with small heads
- Hot glue gun & glue sticks
- Scissors
- Small decorative items (pompons, pumpkins, leaves…)
Step-by-Step Tutorial
Step 1
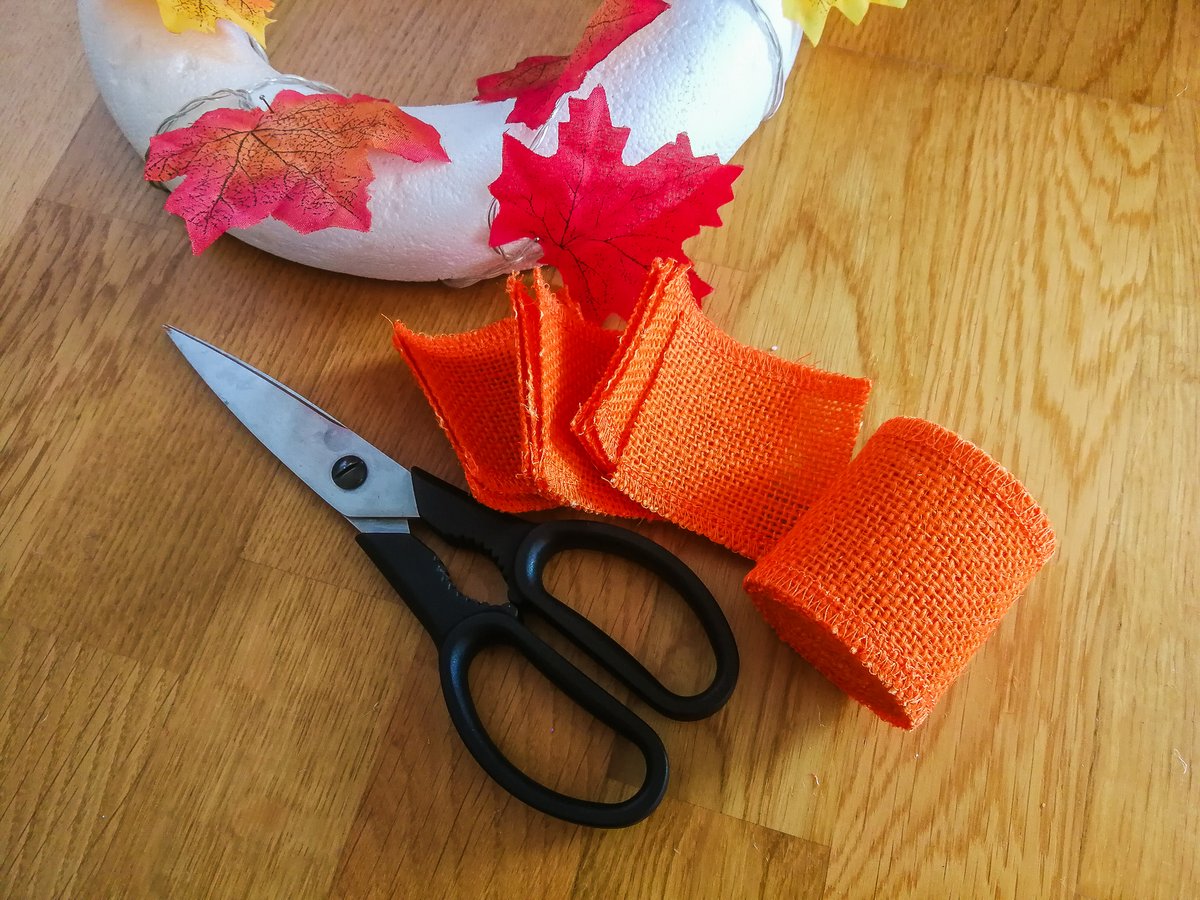
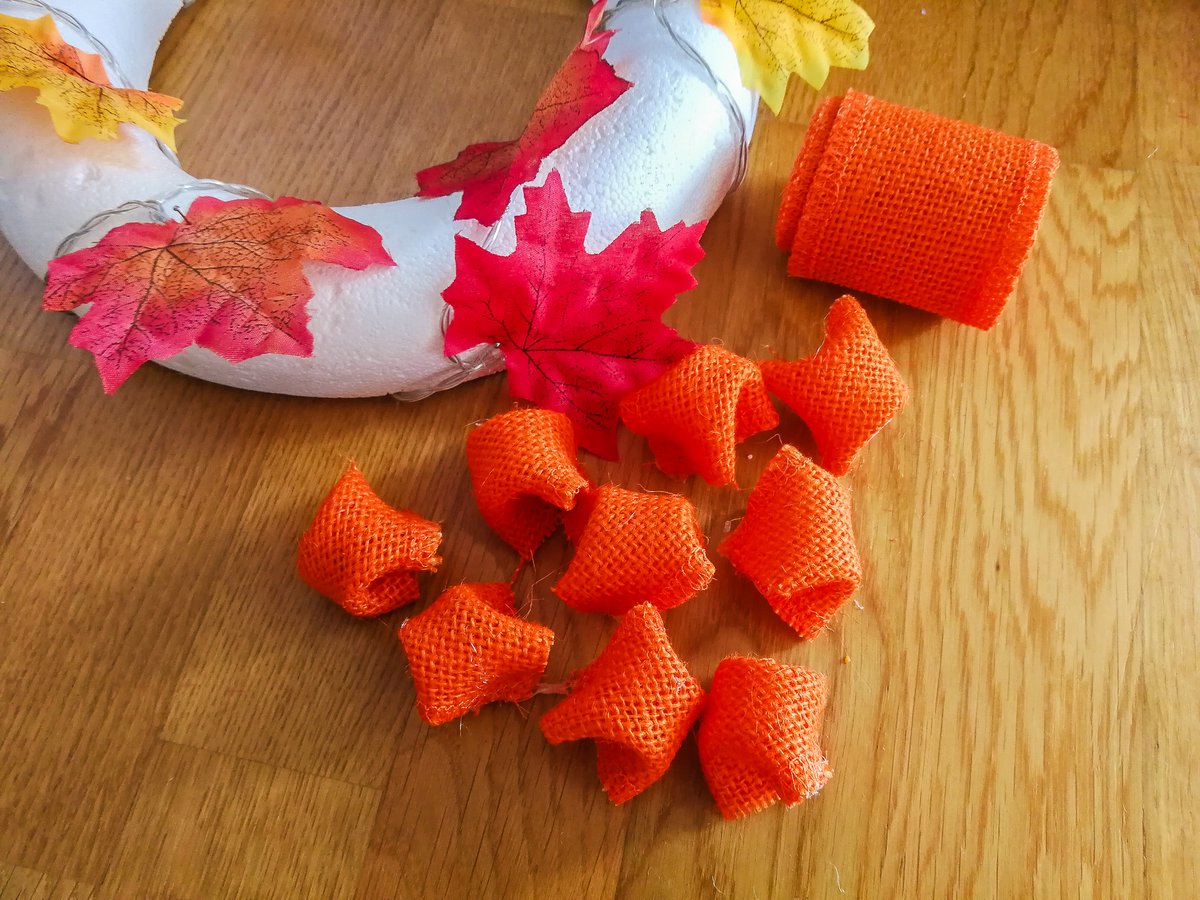
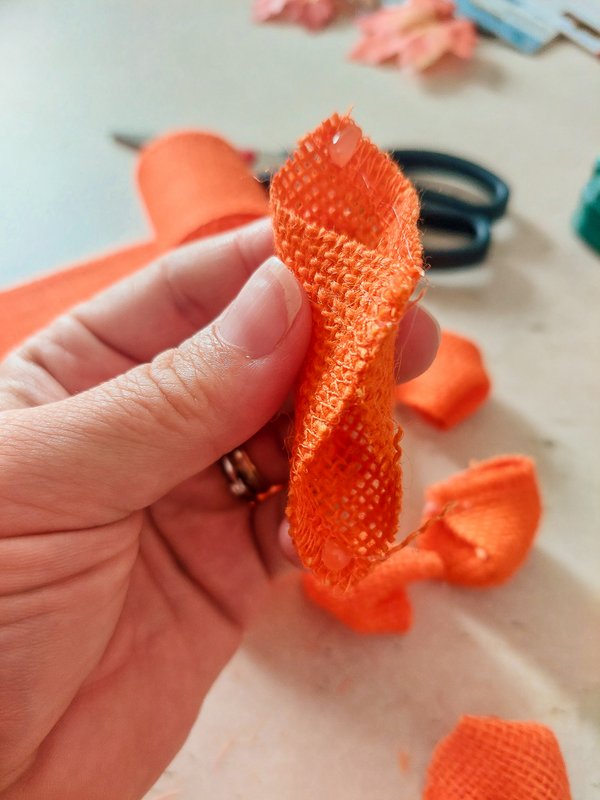
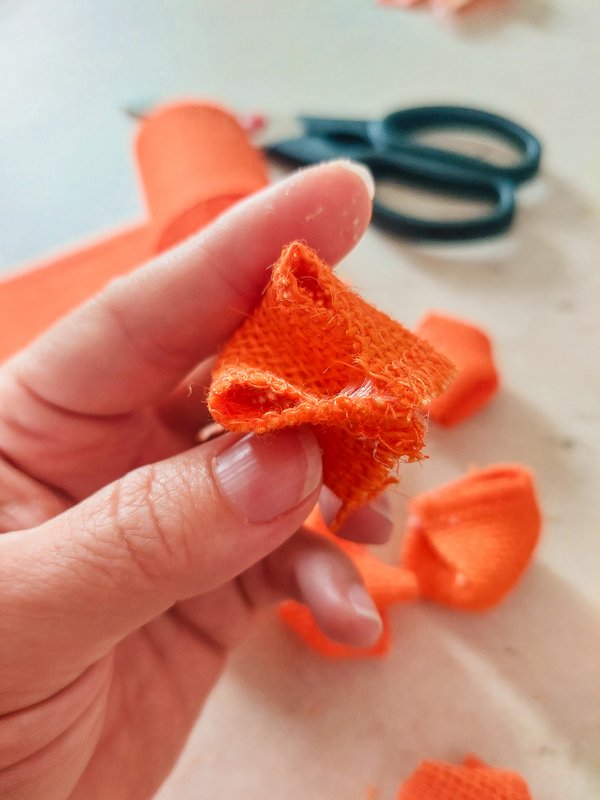
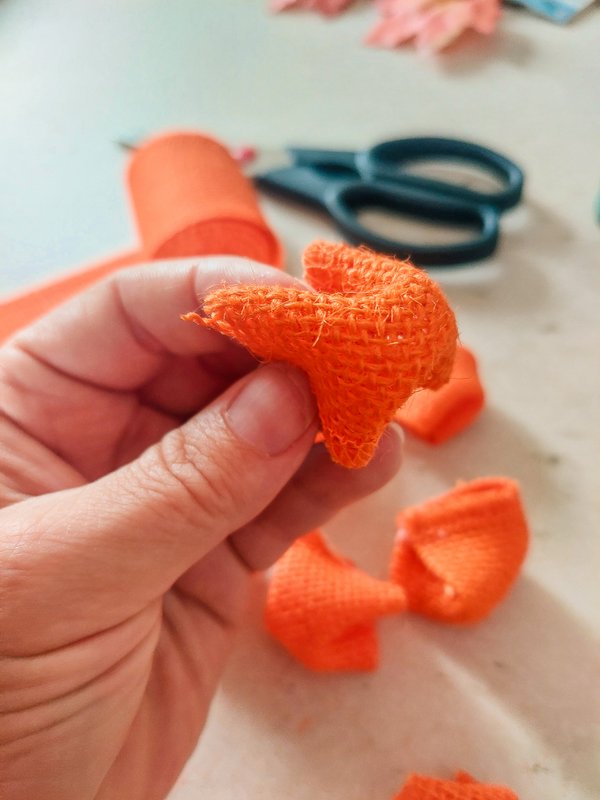
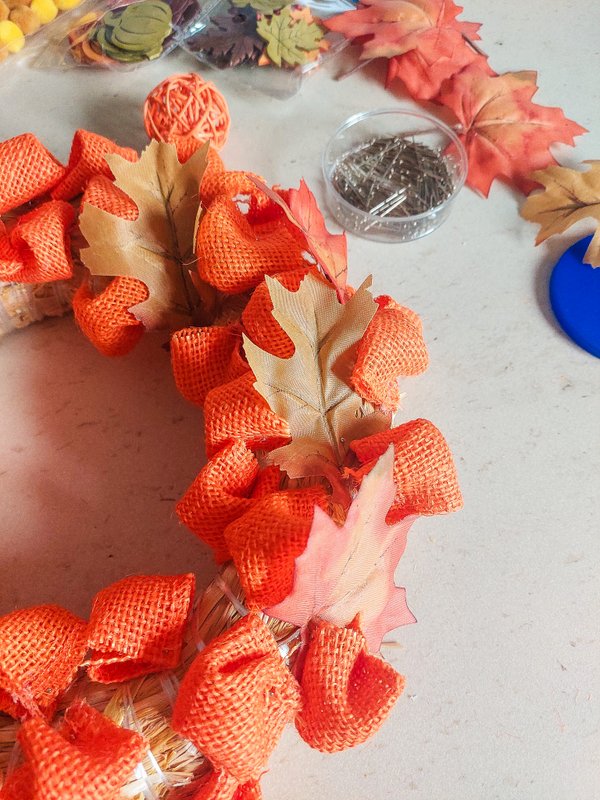
A detailed description (including photos) of how to create jute bubbles can be found in this Easter Wreath tutorial. The procedure is straightforward: cut the ribbon into 5x5cm squares. Take each square, fold it corner to corner to make a triangle, put a little hot glue, and stick together. Bring the sides together – put a pinch of glue to each corner, and fold both sides towards the center of your triangle – and here is your bubble.
Step 2
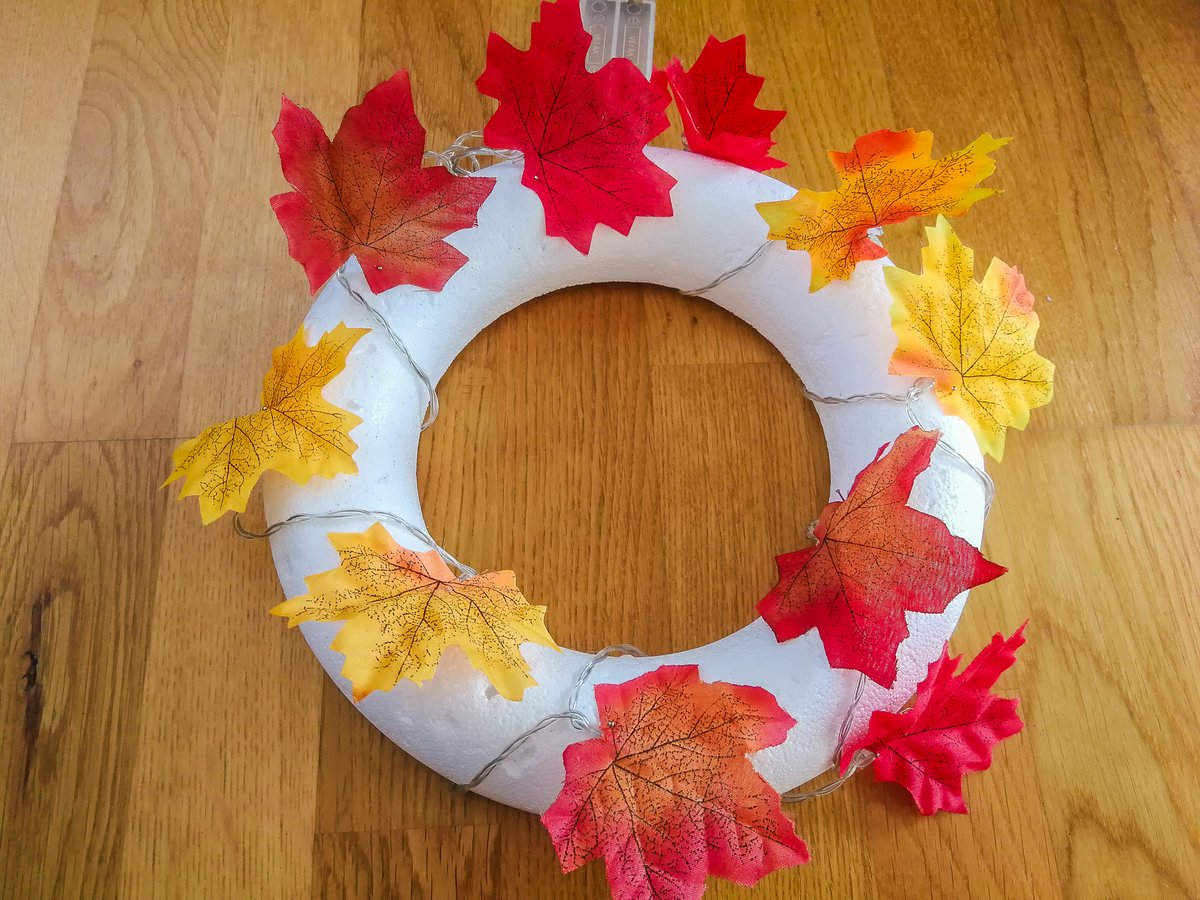
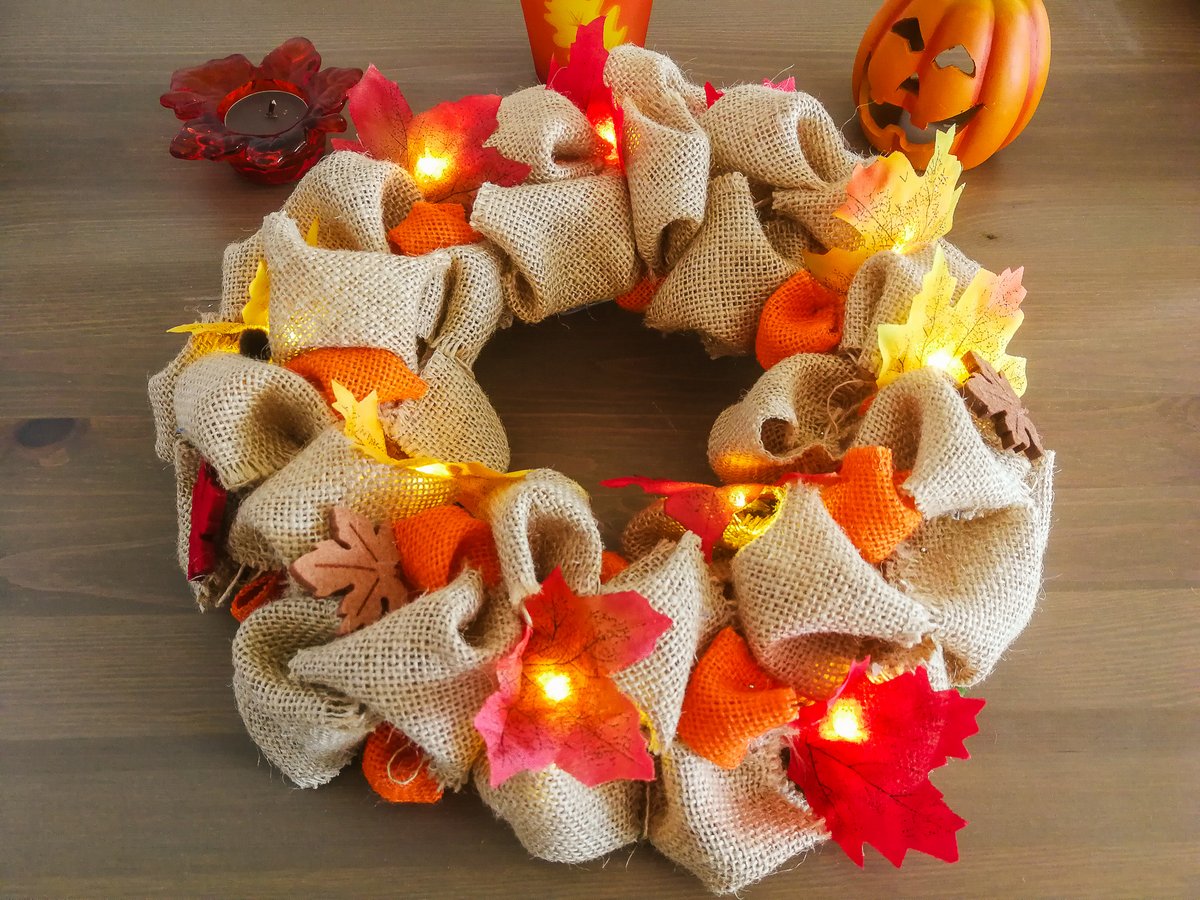
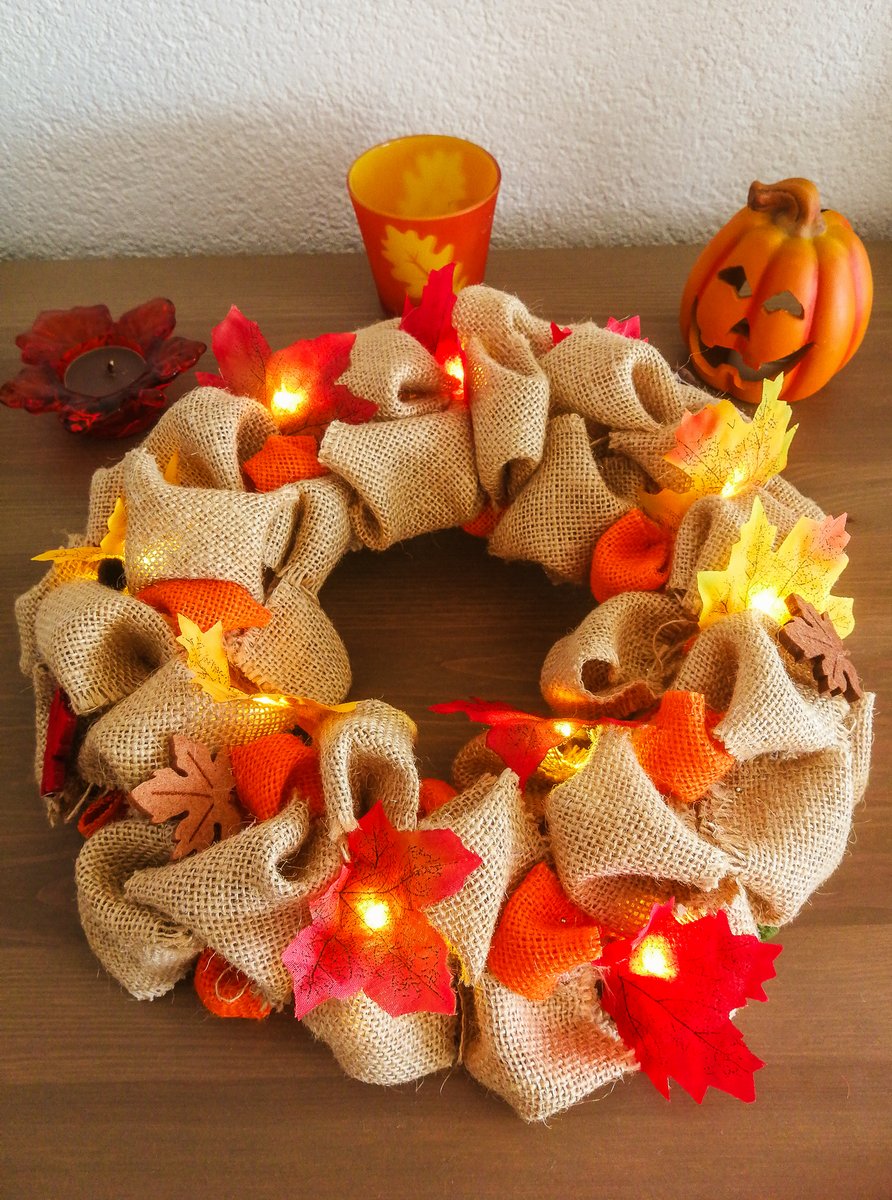
Push the pin through the bottom of the bubble and pin the “bubble” to the body of the wreath. Continue until you have covered the entire body. I didn’t have enough ribbon to cover the whole wreath, so I used fabric leaves to help me.
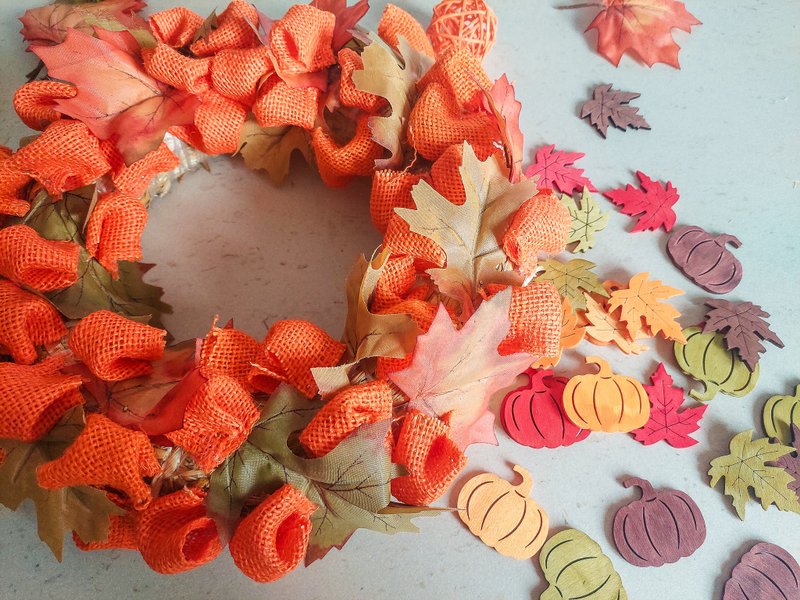
Step 3 – Final decoration
All that’s left is the final decoration to suit your taste. I got little wooden leaves and pumpkins.
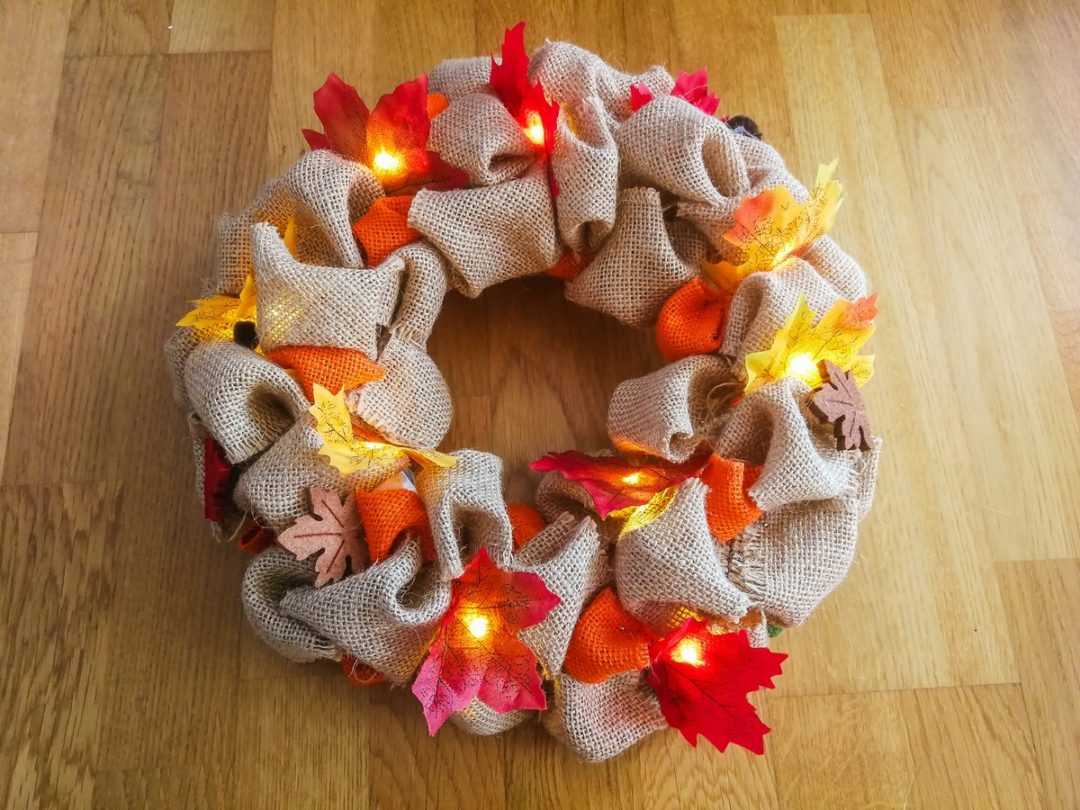
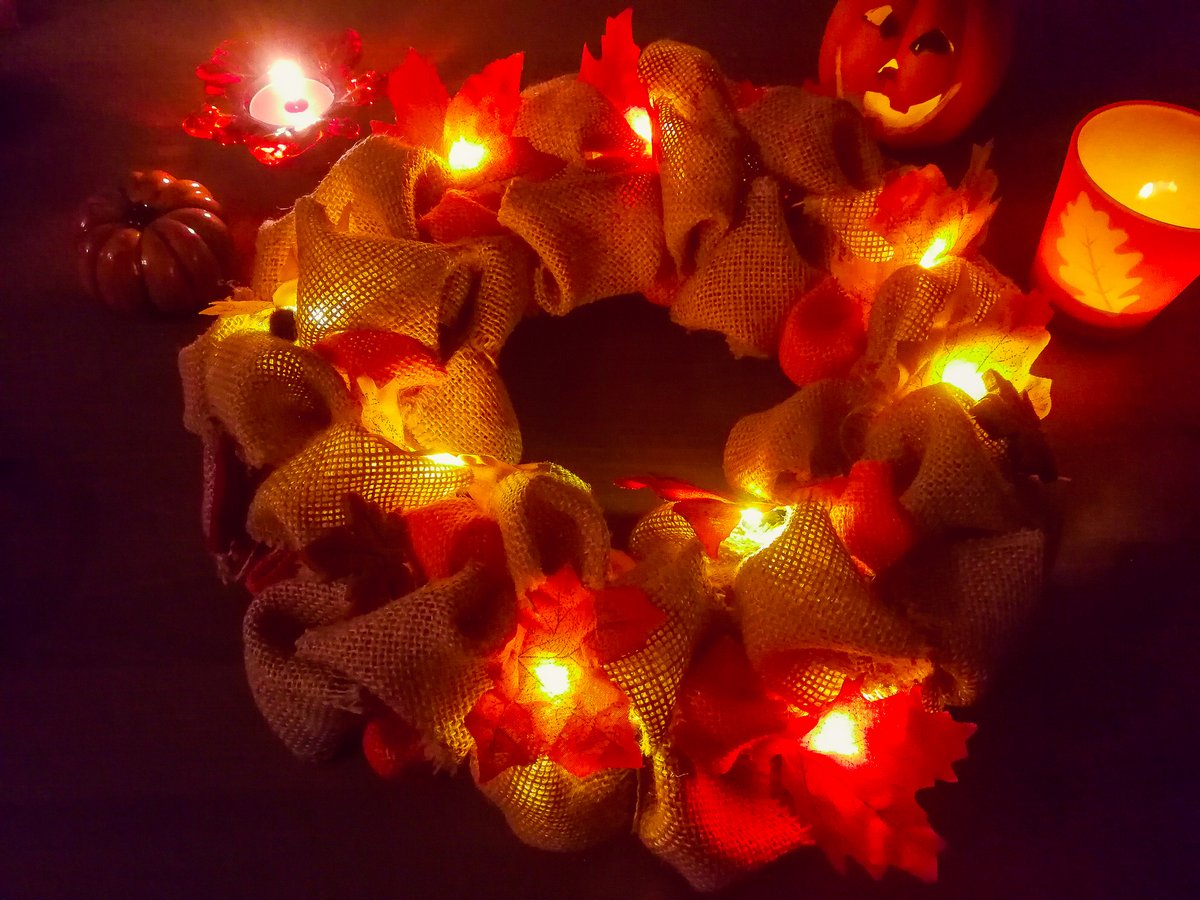
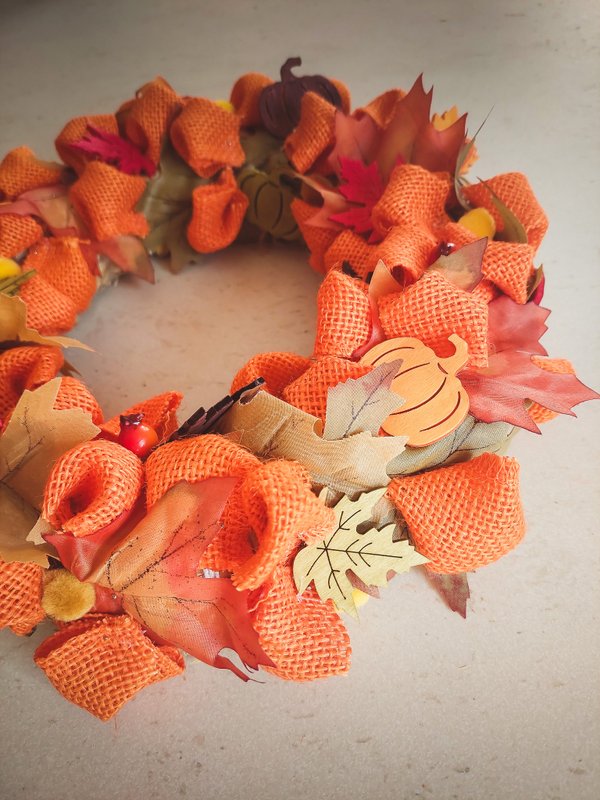
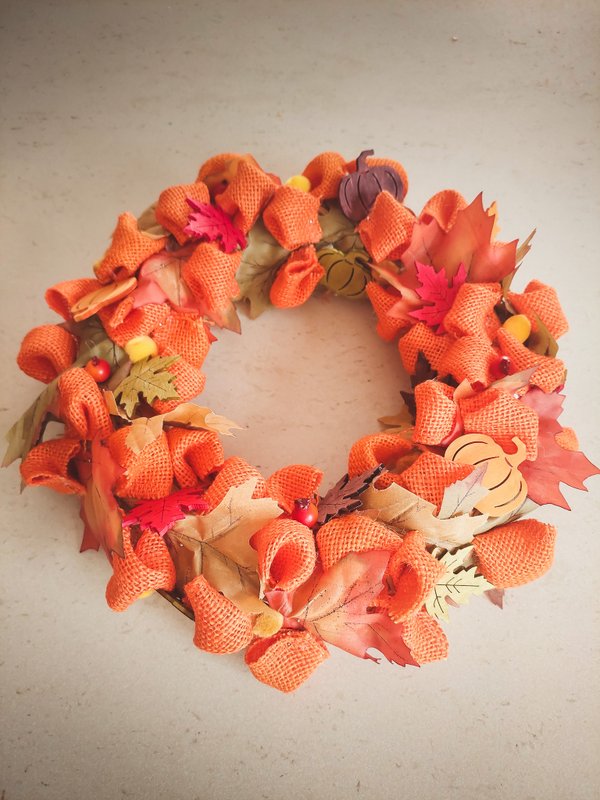
And now, here’s the final result!
I hope you enjoyed this simple tutorial and if you did, I’d be happy to share it if you do. Have a wonderful autumn!
And PS: Don’t forget that I have a second blog where you can find many tips and information about traveling and living in Switzerland.